SCHEME OF WORK
WEEK TOPIC
1. Garment construction processes (A) Arrangement of fullness. (B)Opening.
(C) Fastening (D) Making a simple baby dress.
2. Scientific study of food nutrients; (B) Simple food tests,`
(C ) Effect of heat on food.(moist and dry heat).
3. Meal Planning; (A) Factors that influence meal planning (B) Guidelines for meal planning. (C ) Meals for different groups. (D) Menu card.
4. Buying preservation and storage of food; (A) Factors to consider when buying food. (B) Wise buying (C) Food preservation methods. (D) Food storage methods.
5. Kitchen Equipment and utensils; (a) Factors to consider in choosing food preparation equipment and utensils.
6. Food Preparation and Methods; (A) Food preparation (Cooking) methods. (b) Guidelines for use of cooking d. methods.
7. Food preparation Methods; (c) Procedures for use of cooking methods. (D) Preparation of simple dishes.
8. Marriage; (a) Relationship- Unhealthy Boy/Girls relationship. (b) Courtship practices. (C) Factors to consider before marriage.
9. Marriage; (d) Marriage systems and ‘procedures in Nigeria. (e) Disadvantages of early marriage.
10. Pregnancy and child birth; (a) Pregnancy and it signs.(b) Ante-natal post-natal care. (c) Preparation for child birth, e.g. layette.
11. Revision.
2ND TERM
WEEK 1
LESSON 1
TOPIC: GARMENT CONSTRUCTION PROCESSES.
CONTENTS; 1. Arrangement of fullness and openings
2. Fastening & Making a simple baby dress.
ARRANGEMENT OF FULLNESS AND OPENINGS
Fullness in clothing construction means the provision of extra allowance in the garment. This fullness can be created or controlled using dart, tucks, gathers, easing and pleats.
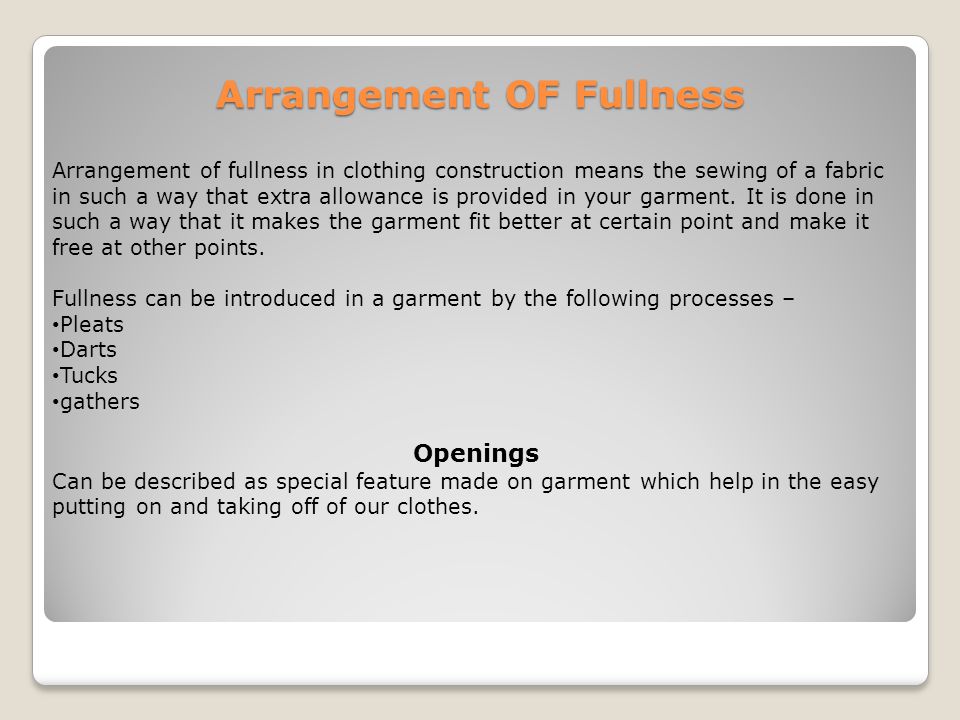
Darts
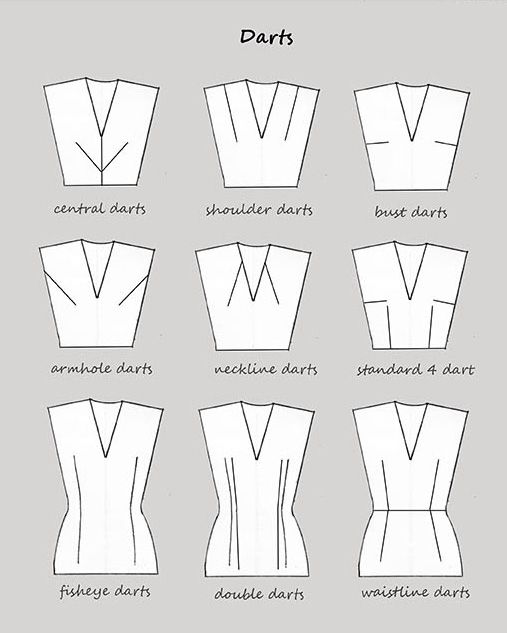
Darts are tapered fold of fabric. They are stitched on the wrong side of a garment section. Darts can be straight, curved or double pointed.
USES OF DARTS:
i. They control fullness
ii. They turn fabric into shape to fit the human figure.
iii. They help to give a good fitting and shape to t he garment.
TO MAKE A DART:
1. Mark the pattern lines properly.
ii. Fold the materials with the right side facing and pattern lines together matching.
iii. Pin and tack the dart along the pattern lines.
Iv. Stitch from the broad end.
V. Knot the ends of the thread.
Vi. Press the dart to side of the stitching.
vii. If the materials is too thick and does not fray, cut along the fold to within 2cm of the point. Then open the turns.

Straight
Curved.
https://youtu.be/m9x-i-txyfo
TUCKS
Turks are special stitched fold made in garments. They are stitched for all or part of the length. When tucks are partly stitched, they are called dart tucks

TO MAKE A TUCK
i. Make the lines for the tuck.
ii. Pin the tuck into place.
iii. Stitch the tuck into place.
iv. Remove tacking.
v. Press each tuck lightly along the stitching line from the wrong side of the fabric
https://youtu.be/0AR9rCXWx48
GATHERS.
Gathers are small soft folds made in garments. They are commonly used in;
i. Children’s clothing
ii. Making lightweight skirts, and
iii. Some sleeve caps, fr’ills, etc.
Gather can made either with hands or machine.

Guidelines for making gathers
i. When a long piece of gathering is to be done, divide the length into sections.
ii. Leave gathering threads until the final stitching is completed.
HOW TO MAKE GATHER
i. Allow up to twice the width of the material for the gathering as required for the finished width.
ii. Mark stitching line (2 rows)
iii. Sew a running stitch along the first marked line. on the right side of the fabric. Note that the line should be below the edge of seam allowance.
iv. Sew running stitch along the first marked line (6mm).apart and bellow the first line.
v. Ensure that thread are left at the end of each row.
vi. Pull both lines of stitches up together to the required length and fasten off.
vii. the gather material is ready for sewing.
https://youtu.be/bBuunc-McnQ
LESSON 2
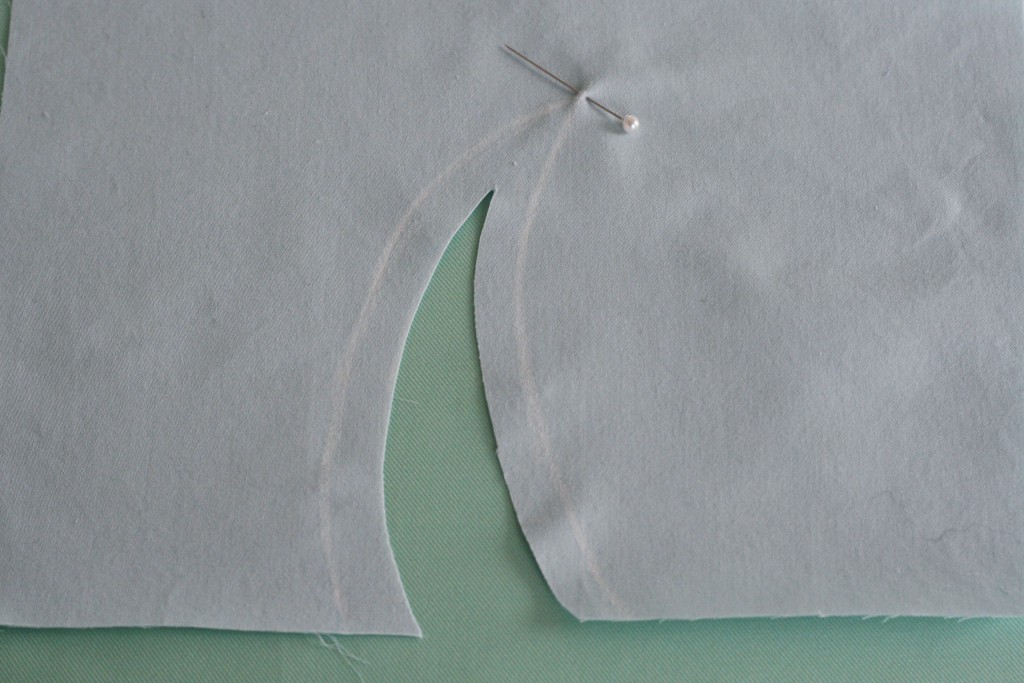
Openings
Openings are features in garments. They help us to put on and take off our clothes. There are different kinds of openings. They can also be used to decorate the garment.
POINT TO CONSIDER WHEN MAKING OPENINGS
I. The opening should be suitable for the position on the garment.
II. It should be suitable for the texture of the fabric e.g. continuous wrap opening light materials.
III. It should be long enough to serve its purpose. A very short opening will result in strain and tear.
IV. It should be as neat and invisible as possible.
V. It should be placed in the position where it will be easy to fasten.
VI. The two sides of the opening should be equal lengths.
VII. The opening should be flat when fastened.
The type of opening depend on two factors, viz.
(a) The use of fabric taken from the garment itself eg. Equal hems mainly use on undergarments and children’s dresses with gathered skirts. And slacks and necks.
(b) Continuous opening used in all fine fabrics, sleeves, side of skirts and slacks. Necks.
(c) Opening used on neck and long sleeves gathered into a cuff.
(d) Warp and facing opening used for side opening of dresses’, shirts, pyjamas and slacks.
(e) Bound openings use on neck and sleeves.
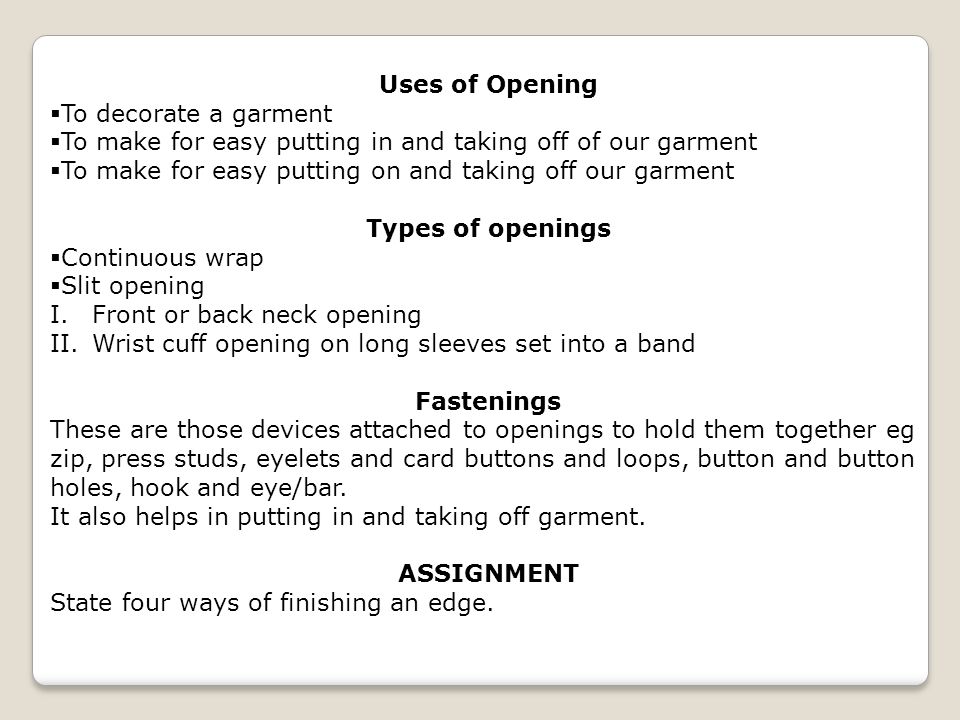
CONTINUOUS OPENING
1. Slit or cut the openings to the required length.
2. Cut out piece of fabrics twice the length of the openings plus 1.5-cm and twice the finished width of the wrap plus turning ( 5-8 cm wide.)
3. Pull the edges of the opening of the garment apart so that they lie in a straight.
4. Place the right side of strip to the right side of slash, with raw edges placed together.
5. Tack or baste 10 mm from the raw edges with the garment side uppermost. Treat the openings as a straight line but pivot or drop about o.5cm at the point of the slash passing fullness behind needle.
6. Machine stitch or backstitch along the tacking line.
7. Remove tacking thread and press turnings in towards wrap.
8. Turn in 6mm on free edge of binding or strip. Fold over raw edges of opening.
9. Take folded edges above first stitches.
10. Hem into position by picking up every machine stitch across middle section of strip. The hem stitching should not appear on the right side of the garment.
11. Fold back the front part openings along stitching line. Let the under lap project.
12. The base of the openings can be secured by stitching across the warp at the base of the openings press the opening flat.
USE OF OPENINGS
i. To allow garments to be put on and take off easily and quickly.
ii. To allow garments to be made in a close –fitting style.
iii. To decorate the garment.
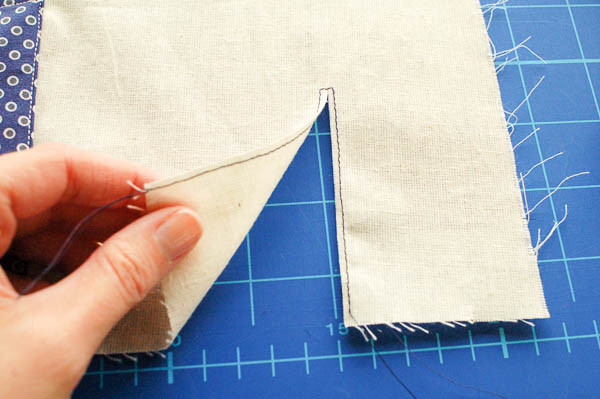
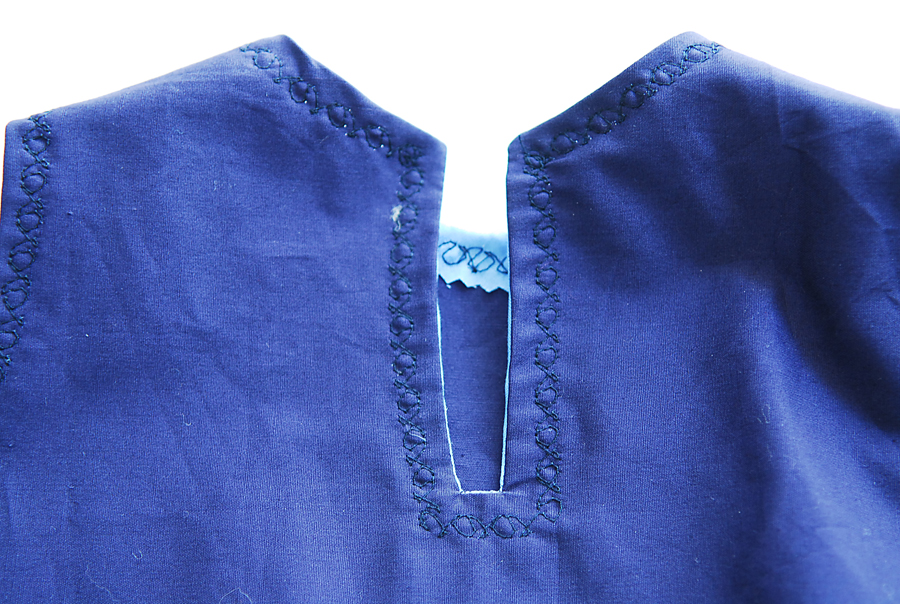
FACE SLIT OPENING
The face slit opening can be used for
I. Front or back neck openings
II. Wrist cuff opening on long sleeves set into a band.
III. It can also be used as decoration, Fastening usually used on the slit opening are loop and button hook and eye, link and button..
https://youtu.be/rfQSsl2JOdI
TO MAKE FASTENING
i. Mark the position of the slit or opening on the garment with a line of tacking stitches.
ii. Cut the facing equal to length of the opening plus an extra 5cm. and width of 5-7cm.
iii. Mark the opening of the facing with a line of tacking.
iv. Turn a single fold of 6mm to the wrong side of facing on one short and two long edge of facing.
v. Place the right side of facing to the right side of the garment .Tacking line marking the opening should lay on one another.
vi. Pins through tacking lines.
vii. Tack both layers of fabric together along the tacking lines
viii. Either backstitch or machine stitch 6cm away centre tacking line along both sides. Slope
ix. Stitches inwards at the base to form a “v” shape.
x. Cut or snip through the line of tacking between the stitches, close to the “v”
xi. Turn the facing to the wrong side, pin and tack around the opening.
xii. Top stitches around the edge opening on the right side.
xiii. Slip- hem the free edge of facing loosely to the garment, to hold the facing in place
https://youtu.be/Vd56pMmT5dw
EVALUATION
1. List three different methods of disposing fullness in garment construction
2. Give three uses of following in dress making:
Darts, Tucks, Gathers, crossway strips
TOPIC: GARMENT CONSTRUCTION PROCESSES.
CONTENTS; 1. Arrangement of fullness and openings
2. Fastening & Making a simple baby dress.
ARRANGEMENT OF FULLNESS AND OPENINGS
Fullness in clothing construction means the provision of extra allowance in the garment. This fullness can be created or controlled using dart, tucks, gathers, easing and pleats.
Darts
Darts are tapered fold of fabric. They are stitched on the wrong side of a garment section. Darts can be straight, curved or double pointed.
USES OF DARTS:
i. They control fullness
ii. They turn fabric into shape to fit the human figure.
iii. They help to give a good fitting and shape to t he garment.
TO MAKE A DART:
1. Mark the pattern lines properly.
ii. Fold the materials with the right side facing and pattern lines together matching.
iii. Pin and tack the dart along the pattern lines.
Iv. Stitch from the broad end.
V. Knot the ends of the thread.
Vi. Press the dart to side of the stitching.
vii. If the materials is too thick and does not fray, cut along the fold to within 2cm of the point. Then open the turns.
Straight
Curved.
https://youtu.be/m9x-i-txyfo
TUCKS
Turks are special stitched fold made in garments. They are stitched for all or part of the length. When tucks are partly stitched, they are called dart tucks
TO MAKE A TUCK
i. Make the lines for the tuck.
ii. Pin the tuck into place.
iii. Stitch the tuck into place.
iv. Remove tacking.
v. Press each tuck lightly along the stitching line from the wrong side of the fabric
https://youtu.be/0AR9rCXWx48
GATHERS.
Gathers are small soft folds made in garments. They are commonly used in;
i. Children’s clothing
ii. Making lightweight skirts, and
iii. Some sleeve caps, fr’ills, etc.
Gather can made either with hands or machine.
Guidelines for making gathers
i. When a long piece of gathering is to be done, divide the length into sections.
ii. Leave gathering threads until the final stitching is completed.
HOW TO MAKE GATHER
i. Allow up to twice the width of the material for the gathering as required for the finished width.
ii. Mark stitching line (2 rows)
iii. Sew a running stitch along the first marked line. on the right side of the fabric. Note that the line should be below the edge of seam allowance.
iv. Sew running stitch along the first marked line (6mm).apart and bellow the first line.
v. Ensure that thread are left at the end of each row.
vi. Pull both lines of stitches up together to the required length and fasten off.
vii. the gather material is ready for sewing.
https://youtu.be/bBuunc-McnQ
LESSON 2
Openings
Openings are features in garments. They help us to put on and take off our clothes. There are different kinds of openings. They can also be used to decorate the garment.
POINT TO CONSIDER WHEN MAKING OPENINGS
I. The opening should be suitable for the position on the garment.
II. It should be suitable for the texture of the fabric e.g. continuous wrap opening light materials.
III. It should be long enough to serve its purpose. A very short opening will result in strain and tear.
IV. It should be as neat and invisible as possible.
V. It should be placed in the position where it will be easy to fasten.
VI. The two sides of the opening should be equal lengths.
VII. The opening should be flat when fastened.
The type of opening depend on two factors, viz.
(a) The use of fabric taken from the garment itself eg. Equal hems mainly use on undergarments and children’s dresses with gathered skirts. And slacks and necks.
(b) Continuous opening used in all fine fabrics, sleeves, side of skirts and slacks. Necks.
(c) Opening used on neck and long sleeves gathered into a cuff.
(d) Warp and facing opening used for side opening of dresses’, shirts, pyjamas and slacks.
(e) Bound openings use on neck and sleeves.
CONTINUOUS OPENING
1. Slit or cut the openings to the required length.
2. Cut out piece of fabrics twice the length of the openings plus 1.5-cm and twice the finished width of the wrap plus turning ( 5-8 cm wide.)
3. Pull the edges of the opening of the garment apart so that they lie in a straight.
4. Place the right side of strip to the right side of slash, with raw edges placed together.
5. Tack or baste 10 mm from the raw edges with the garment side uppermost. Treat the openings as a straight line but pivot or drop about o.5cm at the point of the slash passing fullness behind needle.
6. Machine stitch or backstitch along the tacking line.
7. Remove tacking thread and press turnings in towards wrap.
8. Turn in 6mm on free edge of binding or strip. Fold over raw edges of opening.
9. Take folded edges above first stitches.
10. Hem into position by picking up every machine stitch across middle section of strip. The hem stitching should not appear on the right side of the garment.
11. Fold back the front part openings along stitching line. Let the under lap project.
12. The base of the openings can be secured by stitching across the warp at the base of the openings press the opening flat.
USE OF OPENINGS
i. To allow garments to be put on and take off easily and quickly.
ii. To allow garments to be made in a close –fitting style.
iii. To decorate the garment.
FACE SLIT OPENING
The face slit opening can be used for
I. Front or back neck openings
II. Wrist cuff opening on long sleeves set into a band.
III. It can also be used as decoration, Fastening usually used on the slit opening are loop and button hook and eye, link and button..
https://youtu.be/rfQSsl2JOdI
TO MAKE FASTENING
i. Mark the position of the slit or opening on the garment with a line of tacking stitches.
ii. Cut the facing equal to length of the opening plus an extra 5cm. and width of 5-7cm.
iii. Mark the opening of the facing with a line of tacking.
iv. Turn a single fold of 6mm to the wrong side of facing on one short and two long edge of facing.
v. Place the right side of facing to the right side of the garment .Tacking line marking the opening should lay on one another.
vi. Pins through tacking lines.
vii. Tack both layers of fabric together along the tacking lines
viii. Either backstitch or machine stitch 6cm away centre tacking line along both sides. Slope
ix. Stitches inwards at the base to form a “v” shape.
x. Cut or snip through the line of tacking between the stitches, close to the “v”
xi. Turn the facing to the wrong side, pin and tack around the opening.
xii. Top stitches around the edge opening on the right side.
xiii. Slip- hem the free edge of facing loosely to the garment, to hold the facing in place
https://youtu.be/Vd56pMmT5dw
EVALUATION
1. List three different methods of disposing fullness in garment construction
2. Give three uses of following in dress making:
Darts, Tucks, Gathers, crossway strips
WEEK 2
LESSON 3
FASTENING & MAKING A SIMPLE BABY DRESS.
FASTENINGS.
Most garment need openings. Fastening is the devices or things attached to the openings.
USES OF FASTENINGS.
1. Like the openings fastening allow the garment to be put on and to be taken off
2. They keep the openings in position whilst the garment is being worn.
3. They protect the openings from strain or stretching.
4. They can also be use for decoration.
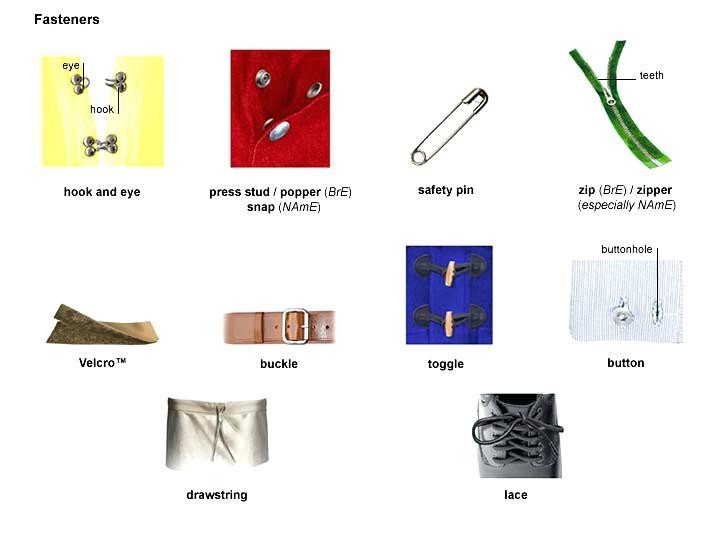
TYPES OF FASTENINGS
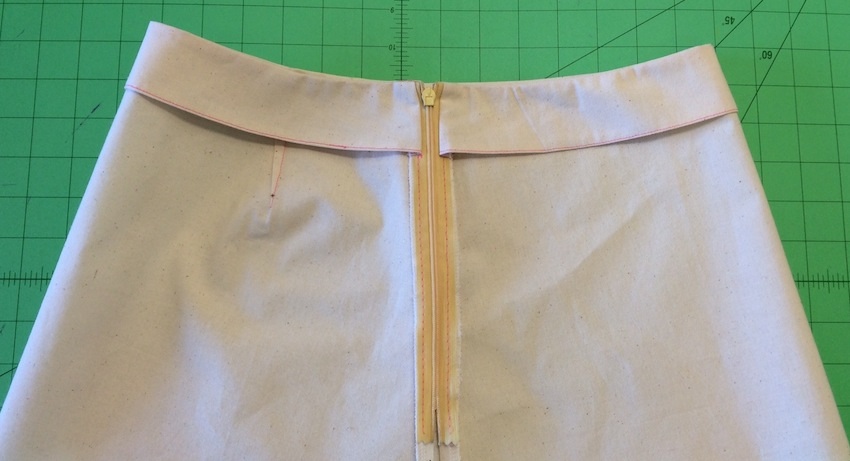
1. Zips; These are useful on blouses, dresses jackets trousers, etc.
2. Press studs; These are used where there is less strain.
3. Hook and eye/bar; These are used where there is strain, to prevent gaping. It can also be used on to fasten the end of neck opening.
4. Button and loops; These are used on opening without a wrap.
5. Buttons and buttonhole; These can be used on opening with a warp.
6. Eyelets and cords; There are used fasten faced slit openings on blouses and children’s dresses.
Points to consider in choosing a fastening.
1. The type of opening to be fastened
2. The type of fabric, e.g. light materials.
3. The use of the fastening e.g. for decoration.
4. The part of the garment to be fastened, eg cuff or neckline or waist band of skirt.
5. The style of the garment. It can be concealed, ie not visible or it can be for decoration.
6. The fastenings should be washable dry clean.
7. The fastening should match the garment in colour, e.g. .Zips and buttons.
GUIDELINES FOR ATTACHING FASTENING.
1. Sew fastening on doubled thickness of material, otherwise reinforce the garment all around the opening.
2. Sew fastenings directly opposite each other, so that opening will flat when fastened.
3. Attach sufficient number of fastenings, so that opening does not gape open when garment is worn.
4. Make fastening invisible unless they are used as part of the garment decoration.
5. Place fastenings close enough together to keep the opening flat when closed.
6. Sew the fastening after the opening has been finished and pressed (except bound buttonholes and loop.)
https://youtu.be/xNy9hLCl0NM
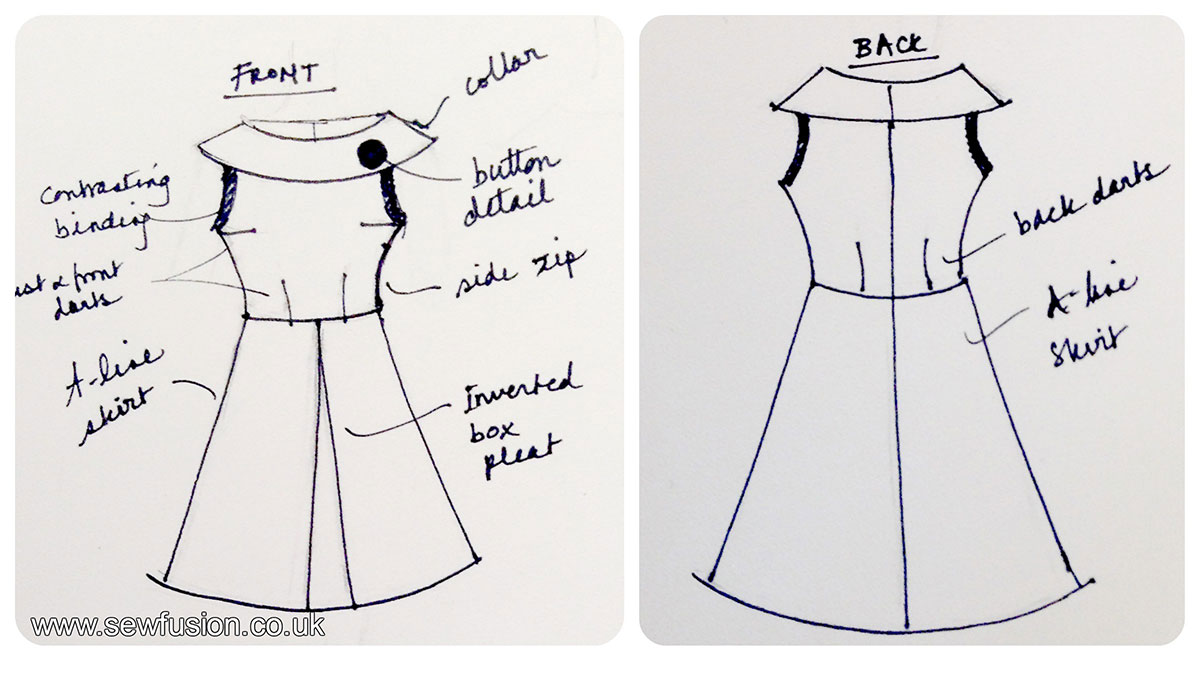
MAKING A BABY‘S DRESS WITH GATHERS, AN OPENING AND A FASTENING.
Points to consider in making a baby‘s dress.
i. Material must be easily laundered e.g. cotton.
ii. Colour and pattern should be suitable for the wearer.
iii. Material should be too expensive.
iv. The style of the garment must allow for it to be easily put on e. g. The use of long openings from neck.
v. The style must allow for the growth of the child.
vi. The style should not involve elaborate decoration.
vii. The sleeve should of a reasonable size and should not be tight fitting,
MAKING THE GARMENT USING A PATTERN
i. Lay out every pattern piece.
ii. Place fabric correctly on the pattern with enough seam allowances .Pin fabric to the pattern.
iii. Cut out the material.
iv. Mark darts tucks stitches and gathers.
Measurement required for drafting the block pattern.
Chest - 60cm
Across back – 10cm.
Shoulder -22 cm
Chest - depth -13.2cm
Back to waist -18.2cm
Length - 60cm
Construction lines ; Back pattern
1Measure AB = Back length + 1.25
2 Measurement BC =1/4 Chest measurement
3 Draw the rectangle ABCD
4 Mark E midpoint of AB, extended toF.
5 Divide the upper part of the rectangle AEFD into16 equal small squares and mark K and H.
6 Measure out the following;
i. A to G 2cm for the back neck
ii. H to 12 cm for shoulder level.
iii. J toC2.5cm for waist line drop.
iv.
7. Using a broomstick or French curve, join
I I . G K for back neck line.
ii. k l for shoulder level.
iii. I F for arm hole
iv. for side seam.
v. Cut out the back ````` block.
Construction lines; front pattern
1. Measure A –B =Back length plus 5 cm .
2. Measure A-D= 1/4 chest measurement plus 2.5cm.
3. Complete the rectangle ABCD.
4. Mark F E= 1/2 A B, ie. ½ back length plus 2.5cm.
5. Join E F= EF to form A E F D.
6. Divide AE F D into 16 small equal squares and mark K and H.
7. Measure out the following; I 1 G=4cm for front neck ii. H –I=2cm for shoulder level. iii. J-C =2. 5cm for waist drop.
8. Carefully join G K I , I F and F J and J L as for the back bodice.
9. For yoke = ¾ the measurement of chest to get the chest arm level.
10. Cut out the yoke and keep.
11. Slash and spread the skirt part of the bodice from ½ underarm level (all 6cm)
12. Add 5.5cm to side seam of the hem line.
https://youtu.be/YLJVmT_rlps
EVALUATION:
1. List three points to consider when choosing fastening
2. Differentiate between fastening and opening.
3. The extra allowance provided in a garment is called.
(a) Fullness
( b) filling
(c) over size.
(d) free size
(e) extra large.
3. The tapered folds of fabric stitched on the wrong side of a garment section is called.
a. Fullness
b. Ease
c. Dart
d. Fold
e. Tuck
5. W hich of the following is not used to create or control fullness in garments?
a darts
b tucks
c gathers
d pleats
e bias
6. Stitch that is suitable for transferring pattern marks unto fabrics is
A Even basting.
B basting
c uneven tacking
d even tacking
e tailor’s tacking
7. Which of the following is made up of small soft folds
A dart
B Tuck
C gathers
D darts
8. Which of the following is made up of small soft folds?
A. Tacks
B. cross way
C. fullness
D. gather
E. dart
ASSIGNMENT
Work book on Home Economics New Concepts for Nigerian Junior Secondary Schools; Book Three by Popoola o . o. (Mrs). Pages 18---19.
FASTENING & MAKING A SIMPLE BABY DRESS.
FASTENINGS.
Most garment need openings. Fastening is the devices or things attached to the openings.
USES OF FASTENINGS.
1. Like the openings fastening allow the garment to be put on and to be taken off
2. They keep the openings in position whilst the garment is being worn.
3. They protect the openings from strain or stretching.
4. They can also be use for decoration.
TYPES OF FASTENINGS
1. Zips; These are useful on blouses, dresses jackets trousers, etc.
2. Press studs; These are used where there is less strain.
3. Hook and eye/bar; These are used where there is strain, to prevent gaping. It can also be used on to fasten the end of neck opening.
4. Button and loops; These are used on opening without a wrap.
5. Buttons and buttonhole; These can be used on opening with a warp.
6. Eyelets and cords; There are used fasten faced slit openings on blouses and children’s dresses.
Points to consider in choosing a fastening.
1. The type of opening to be fastened
2. The type of fabric, e.g. light materials.
3. The use of the fastening e.g. for decoration.
4. The part of the garment to be fastened, eg cuff or neckline or waist band of skirt.
5. The style of the garment. It can be concealed, ie not visible or it can be for decoration.
6. The fastenings should be washable dry clean.
7. The fastening should match the garment in colour, e.g. .Zips and buttons.
GUIDELINES FOR ATTACHING FASTENING.
1. Sew fastening on doubled thickness of material, otherwise reinforce the garment all around the opening.
2. Sew fastenings directly opposite each other, so that opening will flat when fastened.
3. Attach sufficient number of fastenings, so that opening does not gape open when garment is worn.
4. Make fastening invisible unless they are used as part of the garment decoration.
5. Place fastenings close enough together to keep the opening flat when closed.
6. Sew the fastening after the opening has been finished and pressed (except bound buttonholes and loop.)
https://youtu.be/xNy9hLCl0NM
MAKING A BABY‘S DRESS WITH GATHERS, AN OPENING AND A FASTENING.
Points to consider in making a baby‘s dress.
i. Material must be easily laundered e.g. cotton.
ii. Colour and pattern should be suitable for the wearer.
iii. Material should be too expensive.
iv. The style of the garment must allow for it to be easily put on e. g. The use of long openings from neck.
v. The style must allow for the growth of the child.
vi. The style should not involve elaborate decoration.
vii. The sleeve should of a reasonable size and should not be tight fitting,
MAKING THE GARMENT USING A PATTERN
i. Lay out every pattern piece.
ii. Place fabric correctly on the pattern with enough seam allowances .Pin fabric to the pattern.
iii. Cut out the material.
iv. Mark darts tucks stitches and gathers.
Measurement required for drafting the block pattern.
Chest - 60cm
Across back – 10cm.
Shoulder -22 cm
Chest - depth -13.2cm
Back to waist -18.2cm
Length - 60cm
Construction lines ; Back pattern
1Measure AB = Back length + 1.25
2 Measurement BC =1/4 Chest measurement
3 Draw the rectangle ABCD
4 Mark E midpoint of AB, extended toF.
5 Divide the upper part of the rectangle AEFD into16 equal small squares and mark K and H.
6 Measure out the following;
i. A to G 2cm for the back neck
ii. H to 12 cm for shoulder level.
iii. J toC2.5cm for waist line drop.
iv.
7. Using a broomstick or French curve, join
I I . G K for back neck line.
ii. k l for shoulder level.
iii. I F for arm hole
iv. for side seam.
v. Cut out the back ````` block.
Construction lines; front pattern
1. Measure A –B =Back length plus 5 cm .
2. Measure A-D= 1/4 chest measurement plus 2.5cm.
3. Complete the rectangle ABCD.
4. Mark F E= 1/2 A B, ie. ½ back length plus 2.5cm.
5. Join E F= EF to form A E F D.
6. Divide AE F D into 16 small equal squares and mark K and H.
7. Measure out the following; I 1 G=4cm for front neck ii. H –I=2cm for shoulder level. iii. J-C =2. 5cm for waist drop.
8. Carefully join G K I , I F and F J and J L as for the back bodice.
9. For yoke = ¾ the measurement of chest to get the chest arm level.
10. Cut out the yoke and keep.
11. Slash and spread the skirt part of the bodice from ½ underarm level (all 6cm)
12. Add 5.5cm to side seam of the hem line.
https://youtu.be/YLJVmT_rlps
EVALUATION:
1. List three points to consider when choosing fastening
2. Differentiate between fastening and opening.
3. The extra allowance provided in a garment is called.
(a) Fullness
( b) filling
(c) over size.
(d) free size
(e) extra large.
3. The tapered folds of fabric stitched on the wrong side of a garment section is called.
a. Fullness
b. Ease
c. Dart
d. Fold
e. Tuck
5. W hich of the following is not used to create or control fullness in garments?
a darts
b tucks
c gathers
d pleats
e bias
6. Stitch that is suitable for transferring pattern marks unto fabrics is
A Even basting.
B basting
c uneven tacking
d even tacking
e tailor’s tacking
7. Which of the following is made up of small soft folds
A dart
B Tuck
C gathers
D darts
8. Which of the following is made up of small soft folds?
A. Tacks
B. cross way
C. fullness
D. gather
E. dart
ASSIGNMENT
Work book on Home Economics New Concepts for Nigerian Junior Secondary Schools; Book Three by Popoola o . o. (Mrs). Pages 18---19.
WEEK 3
LESSON 4
TOPIC: SCIENTIFIC STUDY OF FOOD NUTRIENTS;
1. CHARACTERISTICS OF FOOD NUTRIENTS
2. EFFECTS OF HEAT ON FOODS (Moist and Dry Heat)
CHARACTERISTICS OF FOOD NUTRIENTS
The quality and value of any food depends on the nutrients it contains. It is therefore necessary that you understand the characteristics of the nutrients and the effects of heat on the nutrients.
Food nutrients are simple, chemical substances which are available in the food we eat. The various food nutrients differ from each other in their physical and chemical properties.
(i) Physical Properties: These include their structural appearances. The physical properties of a food may change when it is treated in certain ways.
(ii) Chemical Properties: These include the chemical compositions of the nutrients. This means the units of elements, groups of elements that make up the nutrients and how they behave under certain conditions.
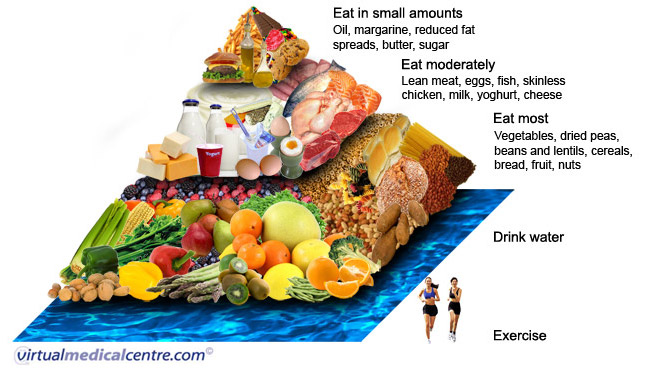
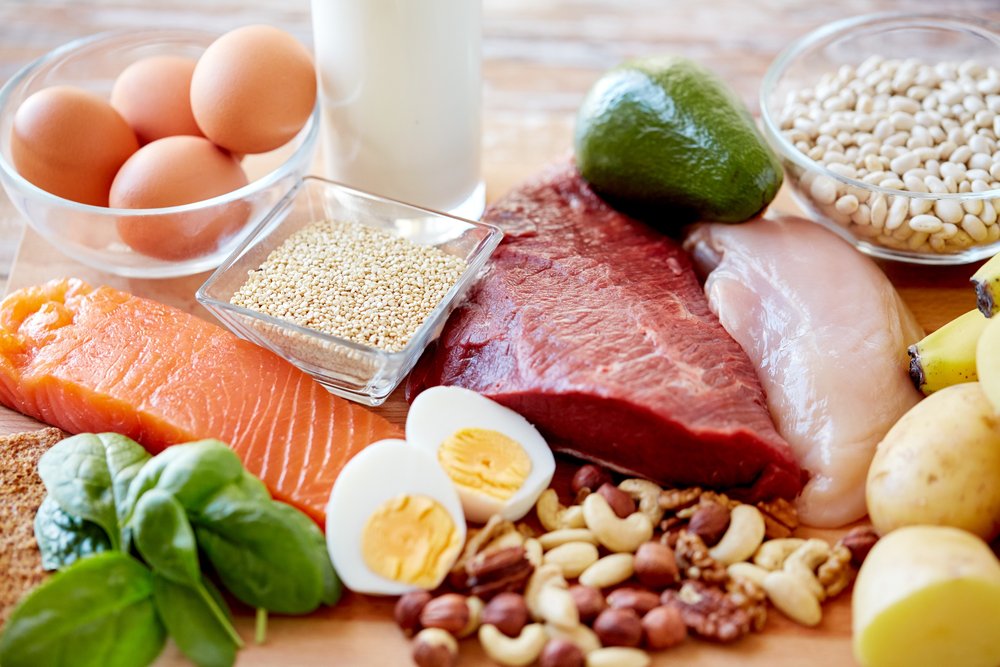
PROTEINS
Proteins are body builders. They are important for building and repairing body tissues. Sources include fish, eggs, meat, poultry, milk, beans etc.
Characteristics of Proteins
i. Proteins are made up of chains of amino-acids.
ii. They contain these elements; carbon, oxygen, hydrogen and nitrogen.
iii. Some proteins also contain small amounts of sulphur or other elements.
iv. The final products of protein digestion are the amino-acids.
v. Proteins are digested by enzymes called protease.
vi. Most protein is insoluble in water.
vii. Some proteins possess an amount of elasticity [i.e. the protein can be stretched during preparation such as the gluten in flour during kneading]
viii. Many proteins are coagulated by heat.
ix. Protein is not destroyed by heat.
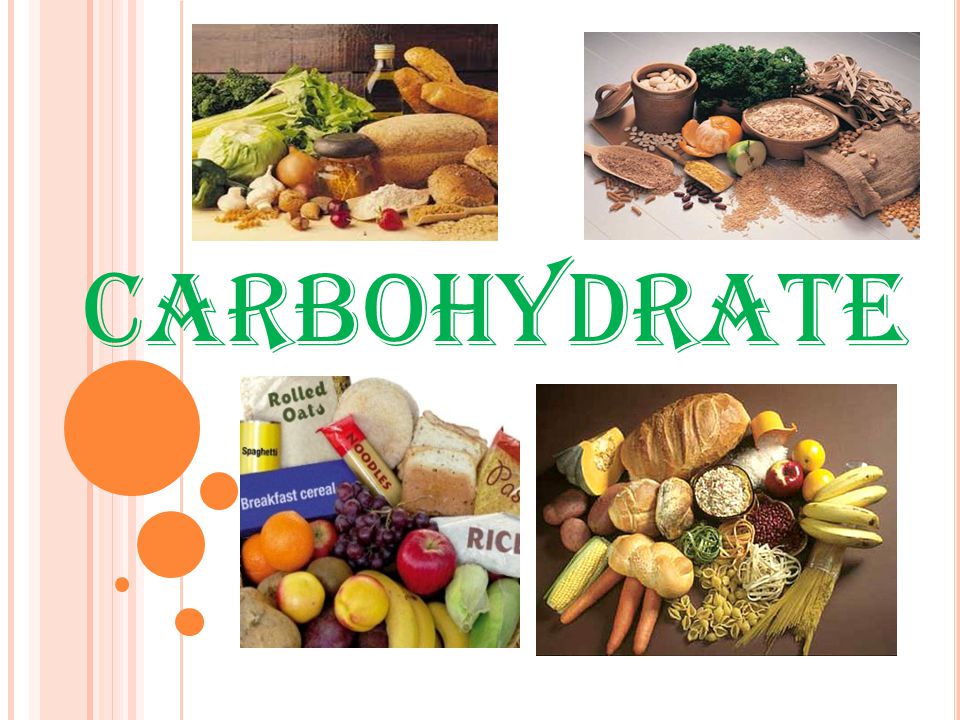
Carbohydrates
Carbohydrates are energy foods. They include starches, sugar and cellulose. Food sources include rice, maize, cassava, yam, millet, etc.
Characteristics of Carbohydrates
(i) The elements that make up carbohydrates are carbon, hydrogen and oxygen. These elements combine in different ways to form: simple sugars e.g. glucose, fructose; complex sugar e.g. lactose, starches e.g. cassava, rice, yam, cellulose, which is found in some vegetables.
(ii) All sugars are sweet, but they vary in sweetness. Sugars are soluble in water.
(iii) They for crystals in dry form.
(iv) Simple sugars are colourless. Starches are white in colour.
(v) They are soluble in water.
(vi) Starches and complex sugars are broken down to simple sugars before animals can use them.
(vii) Starches are often stored as starch, grains in plant cell.
(viii) The last product of carbohydrate digestion is glucose. Dry heat causes sugar to melt into a brown honey like substances called caramel.
Fats and Oils
Fats and Oils are energy givers like carbohydrates. Sources of Fat and oils include palm oils, margarine, butter, fatty meat, egg yolks, groundnut oil etc.
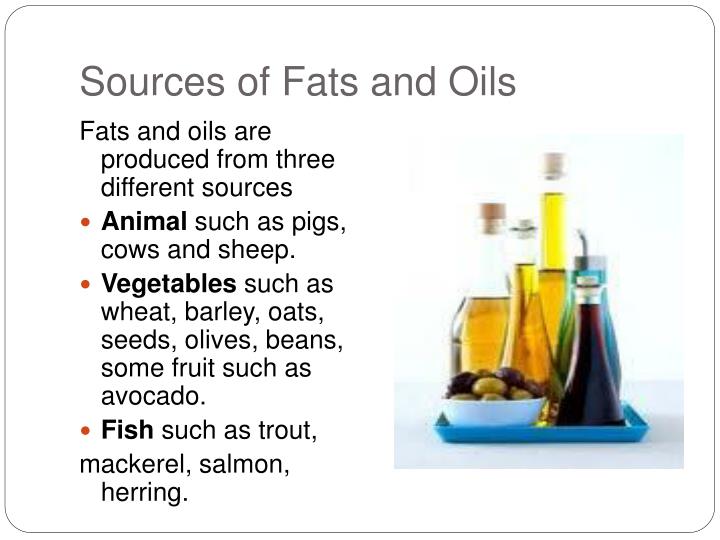
Characteristics of Fats and Oils
(i) They contain high proportions of carbon and hydrogen but very little oxygen.
(ii) They are bad conductors of heat.
(iii) They help to insulate the body from cold and keep it warm.
(iv) Fats and Oils are substances which do not blend with water but are soluble in either.
(v) Fats and oils are normally lighter in weight than water hence oil will float on top of water. Fats are solid at room temperature.
(vi) Oils are liquid at room temperature.
(vii) Fats have a poor keeping quality. When they are exposed to air for prolonged periods, they become rancid. This is spoilage as rancid Fats and Oils have an undesirable flavor and taste.
(viii) They are broken down to fatty acids and glycerol before they can be absorbed by the body.
Vitamins
Vitamins can be defined as organic compounds that are needed by the body and which the body cannot manufacture. The body requires a very small amount of these nutrients. Vitamins are grouped into two classes according to their characteristics; they are water and fat-soluble vitamins.
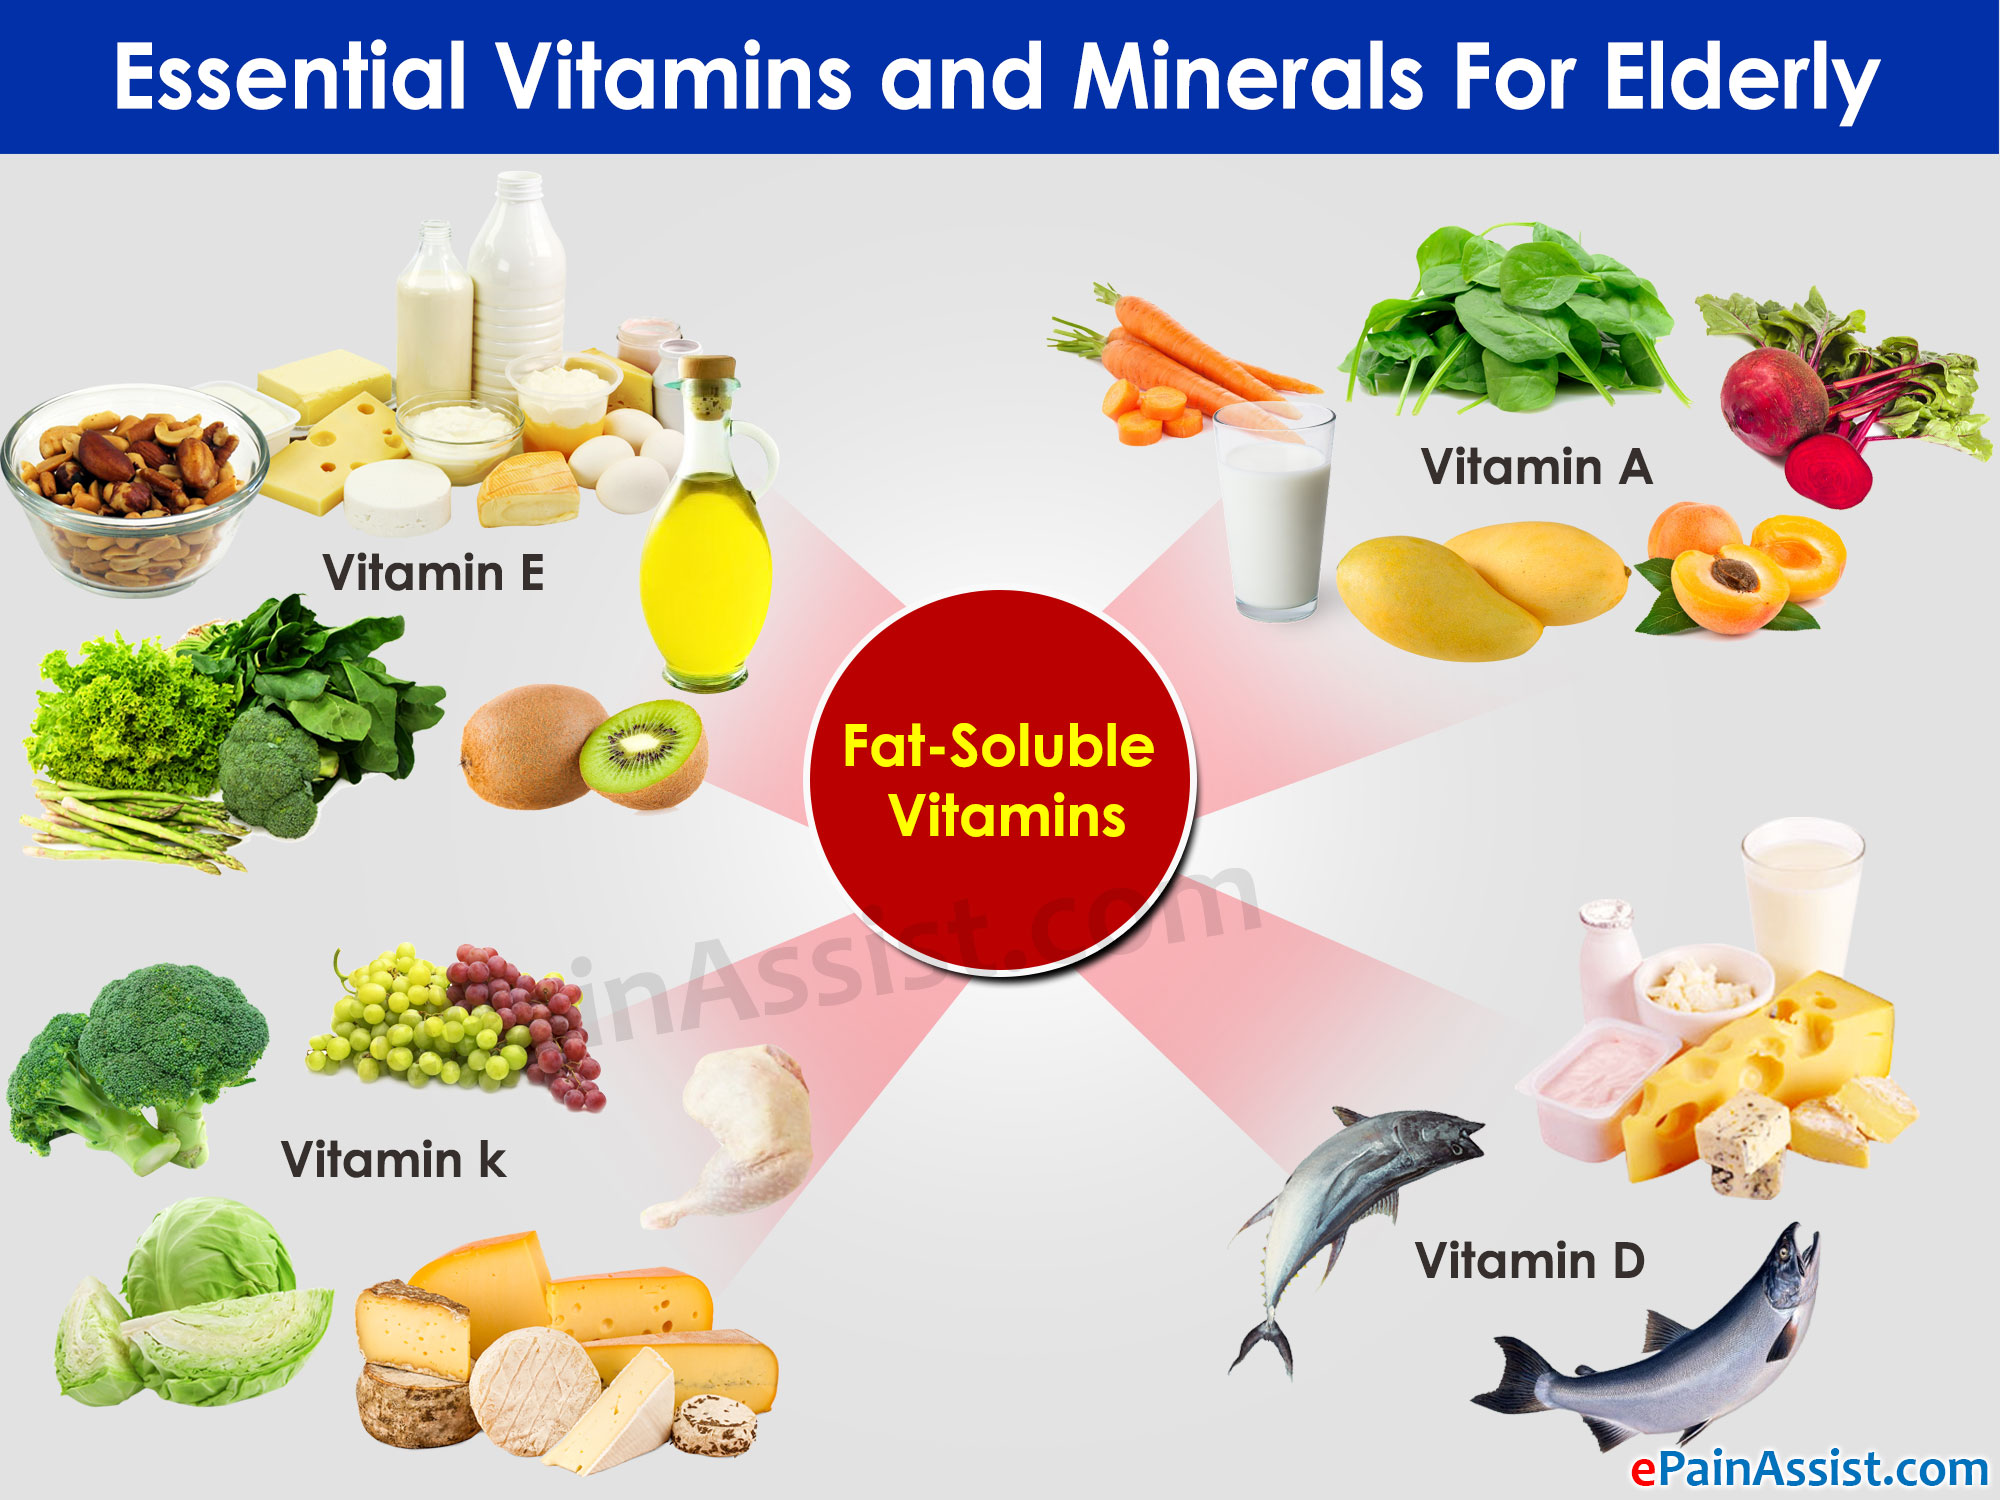
Characteristics of Vitamins
Vitamins A and D: These are fat-soluble vitamins i.e. they are vitamins that does not dissolve in water or get destroyed by ordinary cooking. They are destroyed when the fat that contains them goes rancid i.e. spoiled. Examples are carrot, tomatoes and palm oil.
Vitamins B: This is water-soluble, i.e. it dissolves in water. Food sources should be cooked with small quantity of water using a fast cooking method. Over cooking can lead to loss of vitamins. Examples are liver, yeast, milk, egg.
Vitamins C: This is water-soluble, i.e. it is easily destroyed by heat and exposure to air. It can also be lost by soaking in water. Food sources should be cooked with small quantity of water using a fast cooking method. Examples are oranges, lime, pawpaw.
Minerals
These are substances which are needed by the body. The body requires a very small amount of these substances but it cannot produce them itself, and have to be supplied by the food we eat. Some of the essential minerals include iron, calcium, potassium, sodium etc. All minerals are soluble in water. Examples of foods that contain these minerals are: milk, cheese, egg, green vegetables, sea foods, table salt.
Water
Although water does not have any energy value, it is very essential to life and is present in considerable amounts in almost all the food we eat. Water is composed of hydrogen and oxygen in a ratio of 2:1.
LESSON 5
SIMPLE FOOD TEST
Simple tests to identify the presence of nutrients in foodstuffs.
Test for Protein
1. Millions Test:- The presence of protein in food can be tested by the use of a chemical called million reagents.
Procedure
(i) Place 1-3g of egg white or other ground protein in a test tube.
(ii) Add about 4ml of water and shake.
(iii) Add about 2.5ml of Millions reagent.
(iv) Observe a white precipitate that will be formed.
(v) Place the test tube in a beaker that is half-filled with water.
(vi) Heat the water gently.
Observation: The precipitate will turn red, indicating the presence of protein.
https://youtu.be/2IuN1SvHKM4
2. Burette Test:
(i) Obtain a small quantity of ground meat or egg white.
(ii) Place in a test tube and mix with a few drops of water.
(iii) Add about one cube centimeter (1cm3) of dilute caustic soda (NaOH) and mix well. Add, drop by drop, 1% copper (ii) sulphate solution. Shake thoroughly after each drop.
Observation: A purple or violet colour indicates the presence of protein.
https://youtu.be/DZSzYft-fJ0
Test for Carbohydrates
Test for starch (yam, potatoes, rice, maize etc)
1. Iodine Test
Procedure
(i) Get a slice of yam.
(ii) Place it on a clean glass slide or flat plate.
(iii) Add 1-2 drop of iodine solution to the cut slice of yam.
Observation: The yam turns blue-black in colour. This shows the presence of starch.
https://youtu.be/ubPOWvl6YhM
2. Fehling’s test
Test for simple sugars. (table sugar, honey, fruits e.g. ripe bananas)
Procedure
(i) Place about 5ml of 5% sugar solution in a test tube.
(ii) Prepare the Fehling’s solution by adding equal amounts of Fehling’s solution. A (copper (II) sulphate in water) and B (sodium potassium tartrate and sodium hydroxide in water).
(iii) Add 5ml of Fehling’s solution to sugar solution.
(iv) Place the tube in beaker that has been half-filled with water.
(v) Heat the beaker gently to boiling point.
Observation: An orange or brick-red precipitate will be formed. This shows the presence of sugar.
https://youtu.be/yjLB_ntM324
Test for Oils
1. The Grease Spot Test
Procedure
(i) Rub or mark a little piece of butter of groundnut oil on a sheet of light, white paper.
(ii) Hold up the paper.
Observation: A translucent patch is formed by the oil mark.
https://youtu.be/0WUVbsOE-7k
2. Sudan III Test
Procedure
(i) Place a small quantity of groundnut paste (or any other chopped or mashed food substance that contains fat) in a test tube.
(ii) Add a few drops of Sudan (III) solution or osmic acid.
(iii) Observation: A distinct red colouration is produced
https://youtu.be/M3CRDErBeiU
EVALUATION
1. State three characteristics of each of these food nutrients:
Protein, Fats and oil, Vitamin, Carbohydrate,.
2. Examples of fat soluble vitamins are
(a) vitamin a and b
( b). vitamin d and b.
( c) vitamin a and d.
( d) vitamin c and k,
3. With Fehling’s test, table sugar, ripe banana give------ precipitate.
a orange or brick—red precipitate.
b gelatinization
c caramelization
d dextriniation
TOPIC: SCIENTIFIC STUDY OF FOOD NUTRIENTS;
1. CHARACTERISTICS OF FOOD NUTRIENTS
2. EFFECTS OF HEAT ON FOODS (Moist and Dry Heat)
CHARACTERISTICS OF FOOD NUTRIENTS
The quality and value of any food depends on the nutrients it contains. It is therefore necessary that you understand the characteristics of the nutrients and the effects of heat on the nutrients.
Food nutrients are simple, chemical substances which are available in the food we eat. The various food nutrients differ from each other in their physical and chemical properties.
(i) Physical Properties: These include their structural appearances. The physical properties of a food may change when it is treated in certain ways.
(ii) Chemical Properties: These include the chemical compositions of the nutrients. This means the units of elements, groups of elements that make up the nutrients and how they behave under certain conditions.
PROTEINS
Proteins are body builders. They are important for building and repairing body tissues. Sources include fish, eggs, meat, poultry, milk, beans etc.
Characteristics of Proteins
i. Proteins are made up of chains of amino-acids.
ii. They contain these elements; carbon, oxygen, hydrogen and nitrogen.
iii. Some proteins also contain small amounts of sulphur or other elements.
iv. The final products of protein digestion are the amino-acids.
v. Proteins are digested by enzymes called protease.
vi. Most protein is insoluble in water.
vii. Some proteins possess an amount of elasticity [i.e. the protein can be stretched during preparation such as the gluten in flour during kneading]
viii. Many proteins are coagulated by heat.
ix. Protein is not destroyed by heat.
Carbohydrates
Carbohydrates are energy foods. They include starches, sugar and cellulose. Food sources include rice, maize, cassava, yam, millet, etc.
Characteristics of Carbohydrates
(i) The elements that make up carbohydrates are carbon, hydrogen and oxygen. These elements combine in different ways to form: simple sugars e.g. glucose, fructose; complex sugar e.g. lactose, starches e.g. cassava, rice, yam, cellulose, which is found in some vegetables.
(ii) All sugars are sweet, but they vary in sweetness. Sugars are soluble in water.
(iii) They for crystals in dry form.
(iv) Simple sugars are colourless. Starches are white in colour.
(v) They are soluble in water.
(vi) Starches and complex sugars are broken down to simple sugars before animals can use them.
(vii) Starches are often stored as starch, grains in plant cell.
(viii) The last product of carbohydrate digestion is glucose. Dry heat causes sugar to melt into a brown honey like substances called caramel.
Fats and Oils
Fats and Oils are energy givers like carbohydrates. Sources of Fat and oils include palm oils, margarine, butter, fatty meat, egg yolks, groundnut oil etc.
Characteristics of Fats and Oils
(i) They contain high proportions of carbon and hydrogen but very little oxygen.
(ii) They are bad conductors of heat.
(iii) They help to insulate the body from cold and keep it warm.
(iv) Fats and Oils are substances which do not blend with water but are soluble in either.
(v) Fats and oils are normally lighter in weight than water hence oil will float on top of water. Fats are solid at room temperature.
(vi) Oils are liquid at room temperature.
(vii) Fats have a poor keeping quality. When they are exposed to air for prolonged periods, they become rancid. This is spoilage as rancid Fats and Oils have an undesirable flavor and taste.
(viii) They are broken down to fatty acids and glycerol before they can be absorbed by the body.
Vitamins
Vitamins can be defined as organic compounds that are needed by the body and which the body cannot manufacture. The body requires a very small amount of these nutrients. Vitamins are grouped into two classes according to their characteristics; they are water and fat-soluble vitamins.
Characteristics of Vitamins
Vitamins A and D: These are fat-soluble vitamins i.e. they are vitamins that does not dissolve in water or get destroyed by ordinary cooking. They are destroyed when the fat that contains them goes rancid i.e. spoiled. Examples are carrot, tomatoes and palm oil.
Vitamins B: This is water-soluble, i.e. it dissolves in water. Food sources should be cooked with small quantity of water using a fast cooking method. Over cooking can lead to loss of vitamins. Examples are liver, yeast, milk, egg.
Vitamins C: This is water-soluble, i.e. it is easily destroyed by heat and exposure to air. It can also be lost by soaking in water. Food sources should be cooked with small quantity of water using a fast cooking method. Examples are oranges, lime, pawpaw.
Minerals
These are substances which are needed by the body. The body requires a very small amount of these substances but it cannot produce them itself, and have to be supplied by the food we eat. Some of the essential minerals include iron, calcium, potassium, sodium etc. All minerals are soluble in water. Examples of foods that contain these minerals are: milk, cheese, egg, green vegetables, sea foods, table salt.
Water
Although water does not have any energy value, it is very essential to life and is present in considerable amounts in almost all the food we eat. Water is composed of hydrogen and oxygen in a ratio of 2:1.
LESSON 5
SIMPLE FOOD TEST
Simple tests to identify the presence of nutrients in foodstuffs.
Test for Protein
1. Millions Test:- The presence of protein in food can be tested by the use of a chemical called million reagents.
Procedure
(i) Place 1-3g of egg white or other ground protein in a test tube.
(ii) Add about 4ml of water and shake.
(iii) Add about 2.5ml of Millions reagent.
(iv) Observe a white precipitate that will be formed.
(v) Place the test tube in a beaker that is half-filled with water.
(vi) Heat the water gently.
Observation: The precipitate will turn red, indicating the presence of protein.
https://youtu.be/2IuN1SvHKM4
2. Burette Test:
(i) Obtain a small quantity of ground meat or egg white.
(ii) Place in a test tube and mix with a few drops of water.
(iii) Add about one cube centimeter (1cm3) of dilute caustic soda (NaOH) and mix well. Add, drop by drop, 1% copper (ii) sulphate solution. Shake thoroughly after each drop.
Observation: A purple or violet colour indicates the presence of protein.
https://youtu.be/DZSzYft-fJ0
Test for Carbohydrates
Test for starch (yam, potatoes, rice, maize etc)
1. Iodine Test
Procedure
(i) Get a slice of yam.
(ii) Place it on a clean glass slide or flat plate.
(iii) Add 1-2 drop of iodine solution to the cut slice of yam.
Observation: The yam turns blue-black in colour. This shows the presence of starch.
https://youtu.be/ubPOWvl6YhM
2. Fehling’s test
Test for simple sugars. (table sugar, honey, fruits e.g. ripe bananas)
Procedure
(i) Place about 5ml of 5% sugar solution in a test tube.
(ii) Prepare the Fehling’s solution by adding equal amounts of Fehling’s solution. A (copper (II) sulphate in water) and B (sodium potassium tartrate and sodium hydroxide in water).
(iii) Add 5ml of Fehling’s solution to sugar solution.
(iv) Place the tube in beaker that has been half-filled with water.
(v) Heat the beaker gently to boiling point.
Observation: An orange or brick-red precipitate will be formed. This shows the presence of sugar.
https://youtu.be/yjLB_ntM324
Test for Oils
1. The Grease Spot Test
Procedure
(i) Rub or mark a little piece of butter of groundnut oil on a sheet of light, white paper.
(ii) Hold up the paper.
Observation: A translucent patch is formed by the oil mark.
https://youtu.be/0WUVbsOE-7k
2. Sudan III Test
Procedure
(i) Place a small quantity of groundnut paste (or any other chopped or mashed food substance that contains fat) in a test tube.
(ii) Add a few drops of Sudan (III) solution or osmic acid.
(iii) Observation: A distinct red colouration is produced
https://youtu.be/M3CRDErBeiU
EVALUATION
1. State three characteristics of each of these food nutrients:
Protein, Fats and oil, Vitamin, Carbohydrate,.
2. Examples of fat soluble vitamins are
(a) vitamin a and b
( b). vitamin d and b.
( c) vitamin a and d.
( d) vitamin c and k,
3. With Fehling’s test, table sugar, ripe banana give------ precipitate.
a orange or brick—red precipitate.
b gelatinization
c caramelization
d dextriniation
WEEK 4
LESSON 6
EFFECTS OF HEAT ON FOODS
(Moist and Dry Heat)
The application of heat is very essential in food preparation. Cooking food has some advantages as well as disadvantages.
Advantages:
(i) We cook foods to make them palatable.
(ii) To improve their texture.
(iii) For the body to be able to digest.
(iv) To improve the flavor.
(v) To destroy bacteria (harmful organisms) that may be present in the food.
Disadvantages:
(i) Generally heat destroys some food nutrients.
(ii) Food can also develop some unfavourable colour changes especially when an inappropriate method of cooking is used.
Dry and moist Heat
There are about four different media by which heat is used to cook the food we eat. They are water, air steam and fat/oil.
1. Effects of Heat on Protein
A. Dry Heat
(i) Obtain a small piece of beef.
(ii) Trim off excess fat.
(iii) Wash and allow to drain.
(iv) Place in a pan.
(v) Place in the centre of a pre-heated oven.
(vi) Turn meat over half way through cooking.
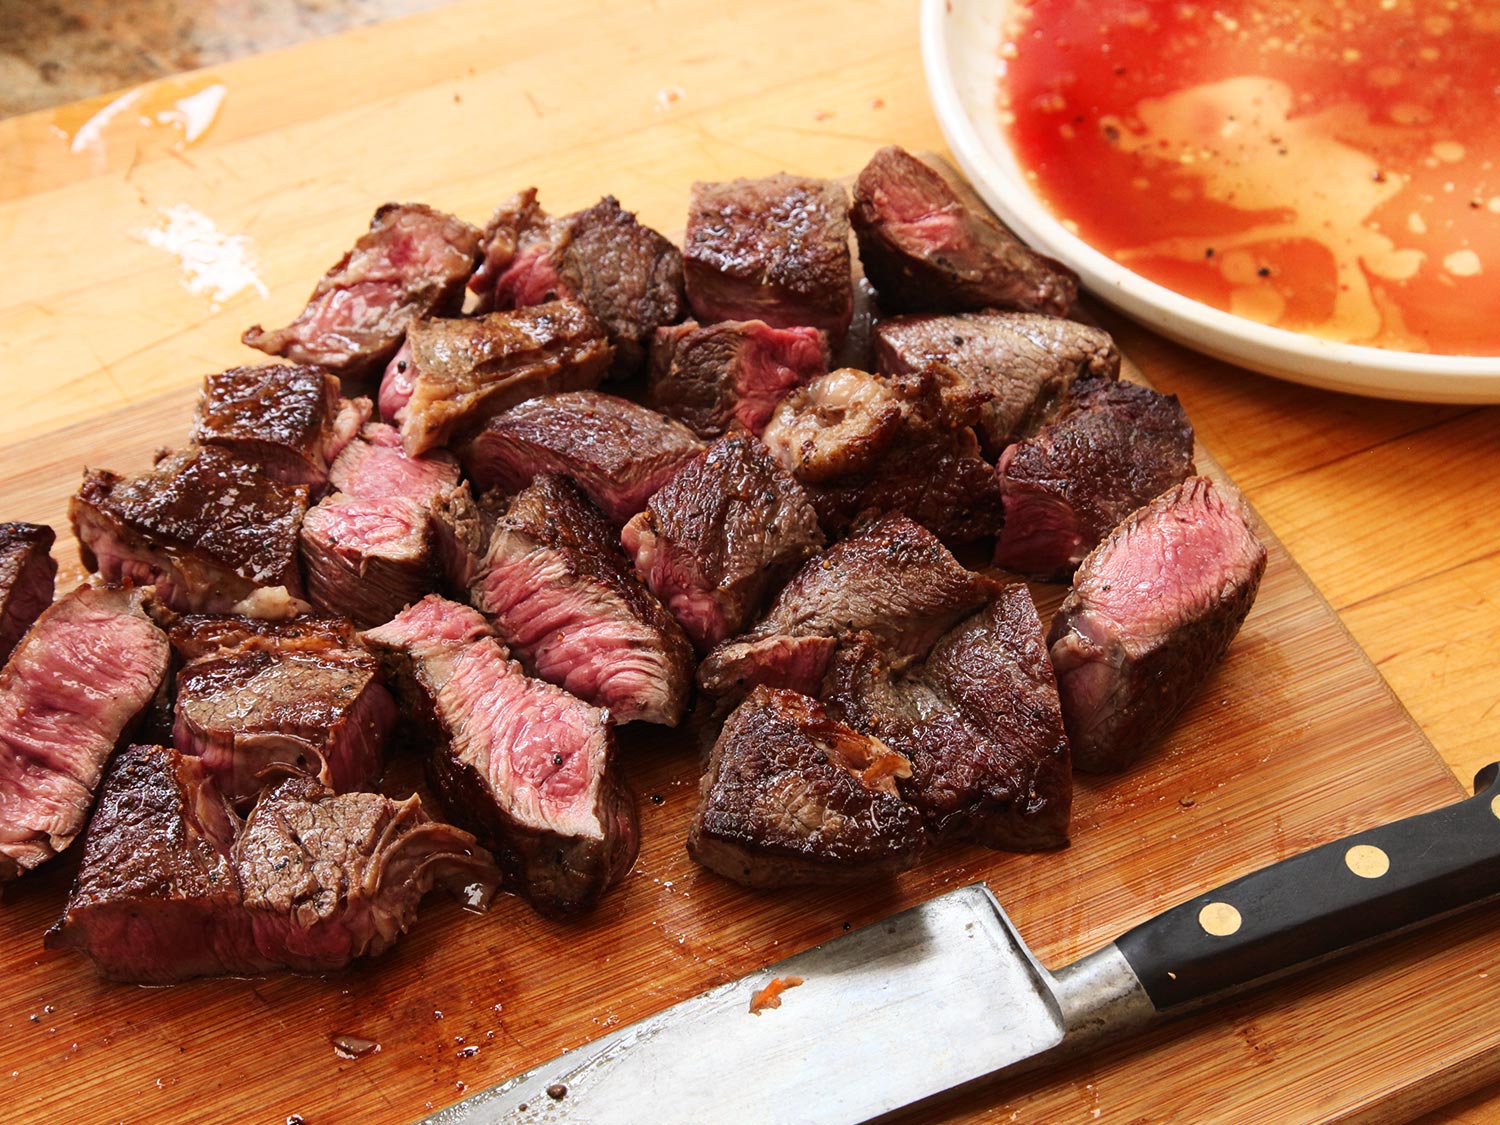
Observation:
When it is cooked, it will be observed that it has become smaller. This shows that protein shrinks when heated. Dry heat hardens the outside of the meat.
A. Moist Heat
(i) Place an egg gently into a saucepan or a poacher.
(ii) Boil or poach the egg for 10 minutes.
(iii) Remove the egg.
(iv) Let it cool down, shell and cut it into two.

Observation: The white of the egg has a solidified or set during boiling or poaching. This effect of the heat on protein is known as coagulation. The same changes takes place when milk, meat or fish are cooked.
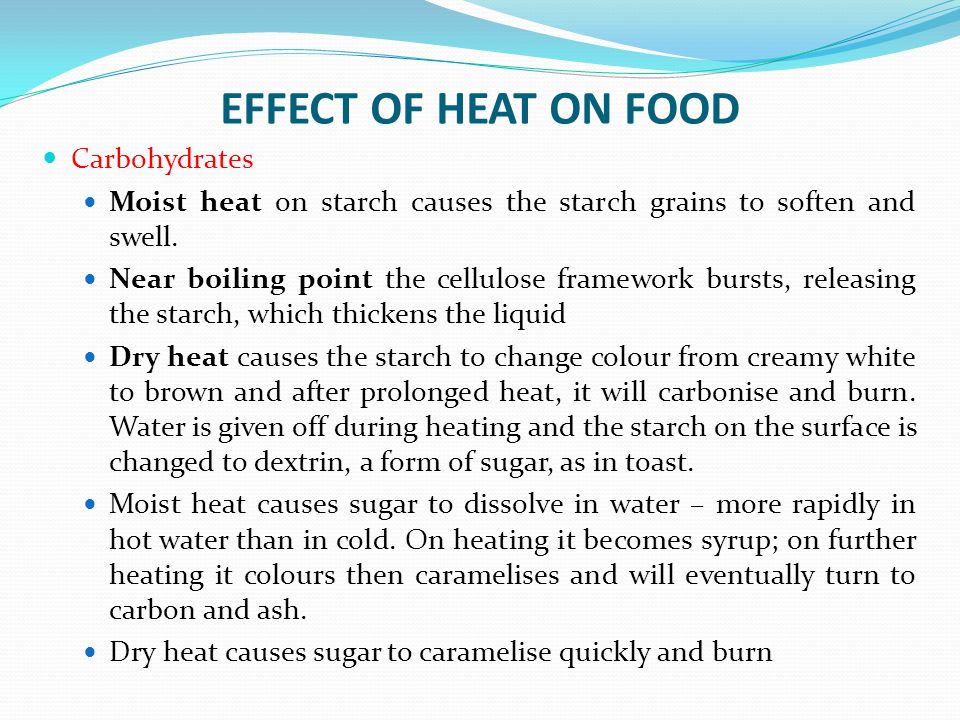
2. Effects of Heat on carbohydrates
A. Dry Heat on starch
(i) Obtain a slice of bread (a slice of yam can also be used).
(ii) Place the slice in a very hot oven or a toaster.
(iii) Leave until light turns light brown.
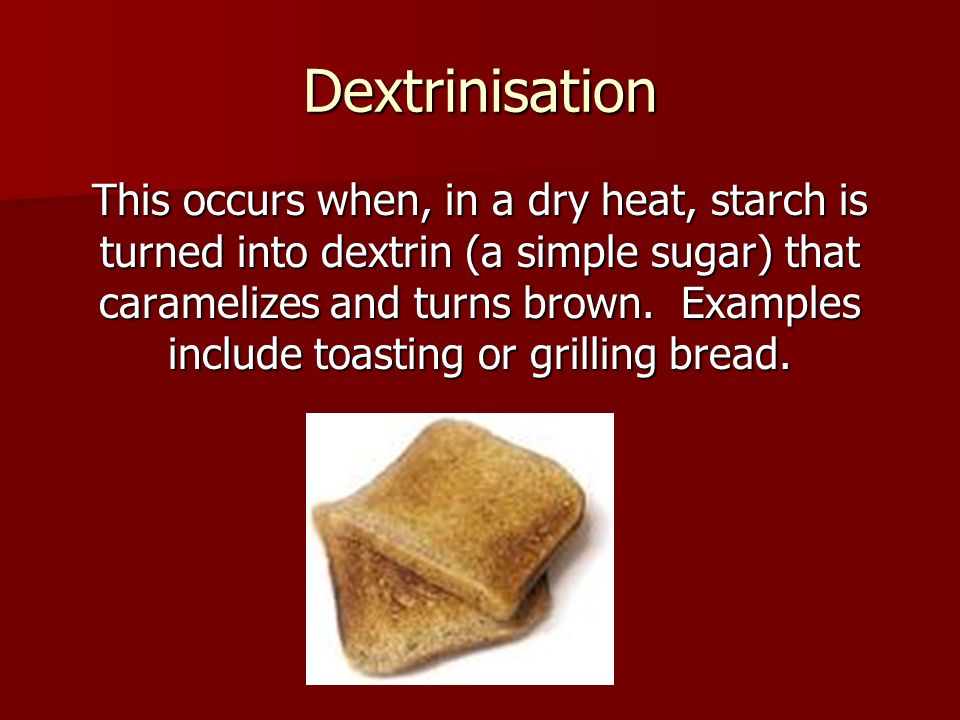
Observation: Light brown colour will be observed. The product is called Dextrin. The process is known as dextrinilation.
B. Moist Heat and Starch
(i) Place 2 teaspoonful of corn starch paste (akamu/ogi) in a bowl.
(ii) Add 6-7 teaspoonful of cold water.
(iii) Mix thoroughly to obtain a slightly liquid consistency.
(iv) Pour boiling water rapidly onto the mixture.
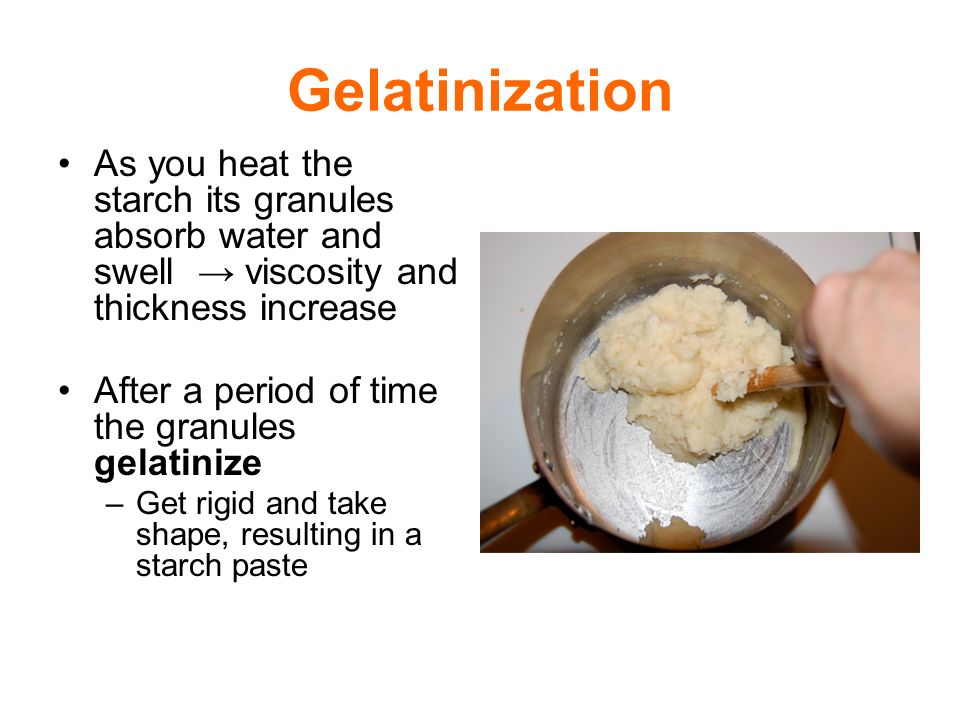
Observation: The starch will swell and a jelly substance will form. The process is called gelatinization. The product is a gel.
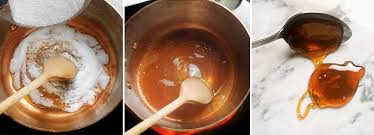
C. Dry Heat on Sugar
(i) Place about 50g of sugar in a small saucepan.
(ii) Heat gently, do not stir.
(iii) Continue heating until there is colour change.

Observation: A brown honey-like substance is formed. This process of production of caramel is known as caramelization. Different shades of brown (from light to very dark brown) can be obtained depending on how long it is heated.
D. Moist Heat on Sugar
(i) Pour about 30g of sugar into a pot or a saucepan containing 150mls of water.
(ii) Heat gently and allow the mixture to dissolve.
(iii) Continue heating until syrup is formed.
Observation: The syrup is formed as the liquid evaporates.
3. Effects of Heat on Fats and Oils
(i) Solid fat melts when heated.
(ii) Oil expands when heated.
(iii) When fat and oil are heated to a very high temperature, they burn and can catch fire. Fumes and unpleasant odours are given out. These irritates the eyes and gives a choking sensation.

EVALUATION
Which of the following is not part of protein?
a. Carbohydrate
b. Hydrogen
c Starch
d Sulphur
e Nitrogen
(2) The last product of protein digestions are A glucose
b fructose
c sugar
d amino acids
E Fatty acid.
(3) Protein, eg. White of egg will----------.in moist heat.
A. coagulate
B. spread
C. increase d
D. decrease
E. enlarge
(4) With burette’s test , protein gives -------. Colour.
(5) With million’s test egg-white gives a-------.precipitate.
a. yellow
b. purple
c. red
d. green
e. blue
(6 )The elements that make up carbohydrates are
a. carbon
b. hydrogen and sulphur
c. oxygen
d. sulphur
(7) To determine the presence of fats and oil in food place--------over the food.
a. iodine
b. chemical
c. blotching paper palm
d. palm oil.
Assignment-
Home economics New concepts for Nigerian Junior Secondary schools Book 3, Page 27-----28.
EFFECTS OF HEAT ON FOODS
(Moist and Dry Heat)
The application of heat is very essential in food preparation. Cooking food has some advantages as well as disadvantages.
Advantages:
(i) We cook foods to make them palatable.
(ii) To improve their texture.
(iii) For the body to be able to digest.
(iv) To improve the flavor.
(v) To destroy bacteria (harmful organisms) that may be present in the food.
Disadvantages:
(i) Generally heat destroys some food nutrients.
(ii) Food can also develop some unfavourable colour changes especially when an inappropriate method of cooking is used.
Dry and moist Heat
There are about four different media by which heat is used to cook the food we eat. They are water, air steam and fat/oil.
1. Effects of Heat on Protein
A. Dry Heat
(i) Obtain a small piece of beef.
(ii) Trim off excess fat.
(iii) Wash and allow to drain.
(iv) Place in a pan.
(v) Place in the centre of a pre-heated oven.
(vi) Turn meat over half way through cooking.
Observation:
When it is cooked, it will be observed that it has become smaller. This shows that protein shrinks when heated. Dry heat hardens the outside of the meat.
A. Moist Heat
(i) Place an egg gently into a saucepan or a poacher.
(ii) Boil or poach the egg for 10 minutes.
(iii) Remove the egg.
(iv) Let it cool down, shell and cut it into two.
Observation: The white of the egg has a solidified or set during boiling or poaching. This effect of the heat on protein is known as coagulation. The same changes takes place when milk, meat or fish are cooked.
2. Effects of Heat on carbohydrates
A. Dry Heat on starch
(i) Obtain a slice of bread (a slice of yam can also be used).
(ii) Place the slice in a very hot oven or a toaster.
(iii) Leave until light turns light brown.
Observation: Light brown colour will be observed. The product is called Dextrin. The process is known as dextrinilation.
B. Moist Heat and Starch
(i) Place 2 teaspoonful of corn starch paste (akamu/ogi) in a bowl.
(ii) Add 6-7 teaspoonful of cold water.
(iii) Mix thoroughly to obtain a slightly liquid consistency.
(iv) Pour boiling water rapidly onto the mixture.
Observation: The starch will swell and a jelly substance will form. The process is called gelatinization. The product is a gel.
C. Dry Heat on Sugar
(i) Place about 50g of sugar in a small saucepan.
(ii) Heat gently, do not stir.
(iii) Continue heating until there is colour change.
Observation: A brown honey-like substance is formed. This process of production of caramel is known as caramelization. Different shades of brown (from light to very dark brown) can be obtained depending on how long it is heated.
D. Moist Heat on Sugar
(i) Pour about 30g of sugar into a pot or a saucepan containing 150mls of water.
(ii) Heat gently and allow the mixture to dissolve.
(iii) Continue heating until syrup is formed.
Observation: The syrup is formed as the liquid evaporates.
3. Effects of Heat on Fats and Oils
(i) Solid fat melts when heated.
(ii) Oil expands when heated.
(iii) When fat and oil are heated to a very high temperature, they burn and can catch fire. Fumes and unpleasant odours are given out. These irritates the eyes and gives a choking sensation.
EVALUATION
Which of the following is not part of protein?
a. Carbohydrate
b. Hydrogen
c Starch
d Sulphur
e Nitrogen
(2) The last product of protein digestions are A glucose
b fructose
c sugar
d amino acids
E Fatty acid.
(3) Protein, eg. White of egg will----------.in moist heat.
A. coagulate
B. spread
C. increase d
D. decrease
E. enlarge
(4) With burette’s test , protein gives -------. Colour.
(5) With million’s test egg-white gives a-------.precipitate.
a. yellow
b. purple
c. red
d. green
e. blue
(6 )The elements that make up carbohydrates are
a. carbon
b. hydrogen and sulphur
c. oxygen
d. sulphur
(7) To determine the presence of fats and oil in food place--------over the food.
a. iodine
b. chemical
c. blotching paper palm
d. palm oil.
Assignment-
Home economics New concepts for Nigerian Junior Secondary schools Book 3, Page 27-----28.
WEEK 5
LESSON 7
TOPIC: MEAL PLANNING
CONTENT: (a) Factors that influence meal planning.
(b) Guidelines for meal planning
(c) Meals for different groups.
(d) Menu card.
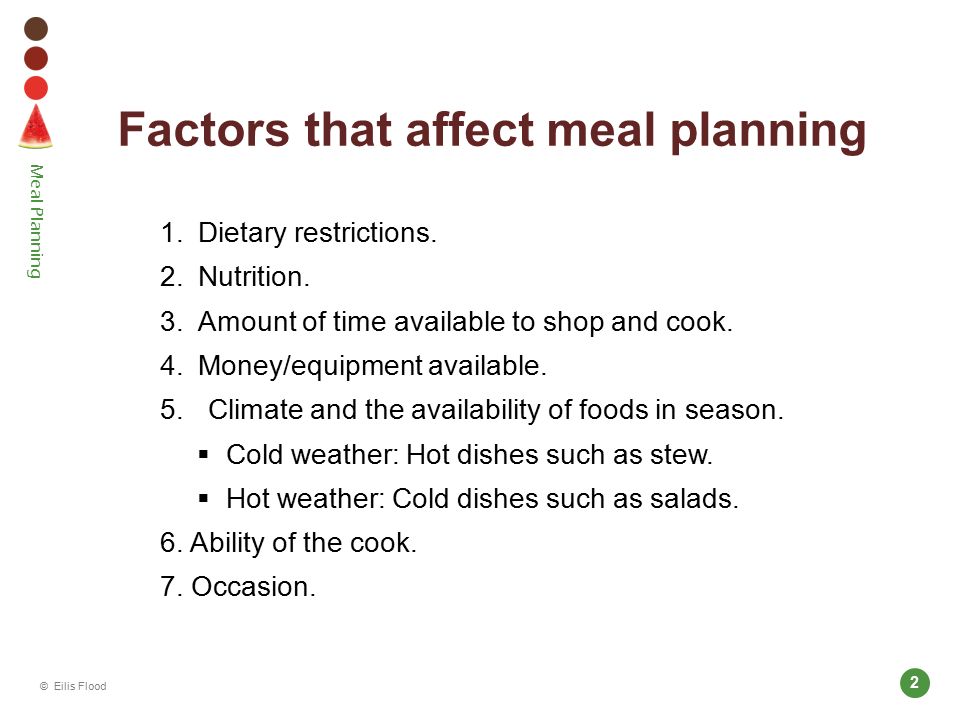
FACTORS THAT INFLUENCE MEAL PLANNING AND GUIDELINES FOR MEAL PLANNING
Factors that influence meal planning.
Meal planning involves choosing a menu or a list of foods that will be included in a meal.
1. Age of family member: The age of each family member influenced his/her nutritional needs.
2. Occupation or activities of family members: The work a person does influence his food needs. For instance, a manual worker e.g. laborer will require more energy foods than a sedentary worker (e.g. a clerk)
3. Health condition of family members: Certain foods are not suitable for certain health conditions. For instance, an obese will avoid those foods that can increase his/ her weight.
4. Size of the family: The size of the family member will determine the quality of meal to plan for.
5. Likes and dislikes of family members: The meal planner must try to plan for those dishes which the family members like.
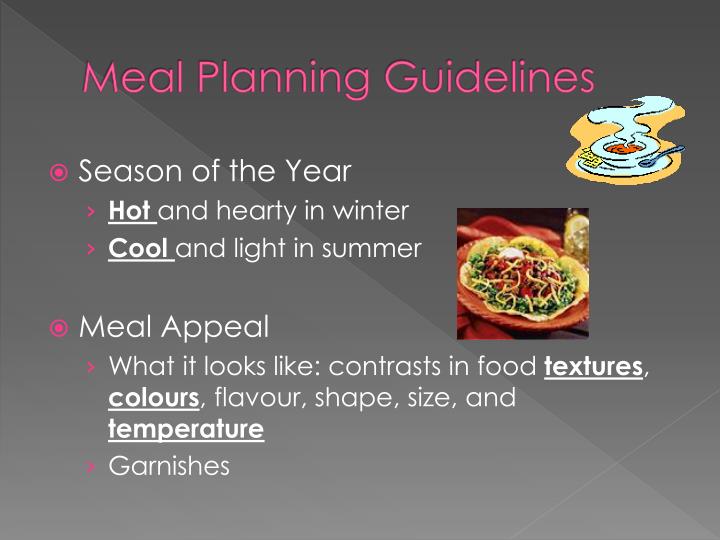
6. Season of the year: Food in season is cheaper, fresher and tastier. It is therefore important for meal planner to consider the foods in season always.
7. Money available: The quality, quantity of food to plan for, depends on the income of a family. For instance, while a high income family may select fresh fish as their source of protein, a low income family may go for frozen fish or second class protein.
8. Equipment or facilities available: Food preparation requires certain facilities or equipment. So, when planning meals the homemaker must ensure that she plans those meals which she has facilities for their preparation?
9. Time available: Where little time is available she has to consider meals that are easy to prepare.
10. Locality or place where family resides: Certain types of food abound in some localities. The foods grown in a given locality will be readily available there and cheap too.
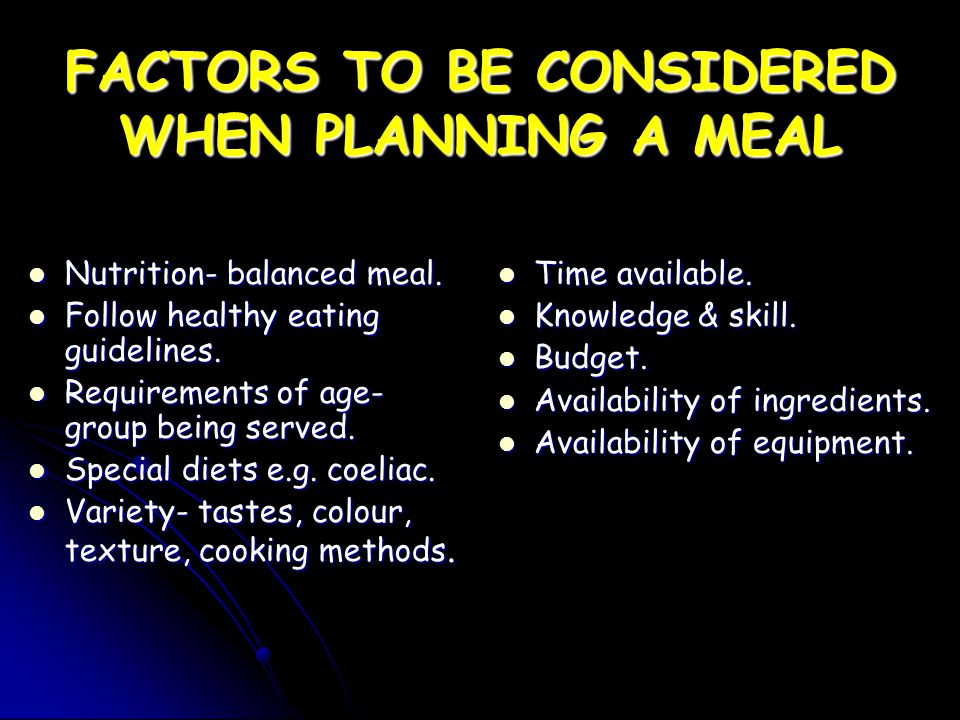
Guidelines for meal planning.
1. The meal must contain all the necessary food nutrients.
2. When possible, choose foods that contain a variety of nutrients.
3. Provide for the nutritional needs of all family members in the meal plan.
4. Avoid monotony by varying foods. Do not give one type of meal always. Use variety of foods.
5. Make use of foods in season. These are normally cheaper and could be of better quality than foods that are not in season.
6. Buy the best foods your money can afford.
7. Plan meals several days ahead of time so as to save money and time.
8. Buy good quality foods.
EVALUATION:
1. What are the guidelines for meal planning?
2. Factors that influence meal planning.
LESSON 8
MEALS FOR DIFFERENT GROUPS AND MENU CARD
MEALS FOR DIFFERENT GROUPS.
1. Young children: (Infants 0-1 year and toddlers 1-2 years): Young children are growing rapidly. They are also very active. They require food for growth and their activities.

2. Older children: These are also growing and active. They equally need body building and protective foods. They spend much energy at play. Therefore they require sufficient energy giving food in their diet.
3. Adolescents: Adolescence is a period for rapid growth. The adolescents therefore need proper feeding. Their food should be rich in protein, carbohydrates, minerals and vitamins.
4. Adolescent’s girls: They require increased intake of iron. This is to make up for that which they lose monthly during menstruation. Insufficient supply of iron in the girls ‘diet can result in anemia.

5. Adults: Members of this group have reached maturity and stopped growing. They therefore require food energy and maintenance rather than for growth. An adult’s diet should be balanced. It should also be suitable for his work, health and age. Over-weight must be avoided.
The following are special groups of adults, the manual worker, sedentary worker, pregnant woman, and lactating mothers.

6. Elderly people or the aged: Members of this group are often characterized by reduced physical activity. They therefore spend less energy. This means that the quantity of energy food required by the aged needs to be slightly decreased. Their needs for proteins, vitamins and minerals remain unchanged. Their food must be easy to chew and digested.

7. The sick and the convalescent
An invalid is a person who is sick. A convalescent is one who is no longer sick but is in the process of gradual recovery after illness. These two groups may have suffered breakdown of body tissues, loss of weight, loss of appetite and they could also be weak and lack certain nutrients.
Meals must be balanced. Meals should include good quantity proteins, vegetables, fruits for the repair of tissues and prevention of further infection. Meals must be cooked by the most easily digested methods such as boiling, stewing and steaming.

8. Vegetarian.
A strict vegetarian will not eat the flesh of animal foods e.g. meat, fish, egg and their product. Lacto-ovo vegetarians will not eat the flesh of animals and fish. They however drink milk and eat butter and cheese. In both cases they should combine numerous vegetable proteins, including soya beans.
PEOPLE WITH SPECIAL NUTRITIONAL NEEDS.
MENU CARD
A menu card is a card or sheet of paper that shows the meals or courses for breakfast, lunch and supper. It is commonly displaced in the dining halls or restaurants of hotels. In such places the menu card contains a number of meals from which a customer or guest can choose from family dining tables.
Guidelines for writing a menu card.
It should be eye-catching and attractive.
It should contain all the courses or dishes
It should not be over-crowded
The courses should be arranged in the order in which they are to be beaten.
Breakfast Menu
Chilled orange
Corn flakes/Quaker oat/pap
Fried/poached/boiled egg
Potato/yam/plantain chips.
Tea/coffee/chocolate toast.
Lunch menu
Nsala soup ( appetizer)
Meat/fish vegetable soup
Pounded yam/gari.
Pawpaw rings(dessert)
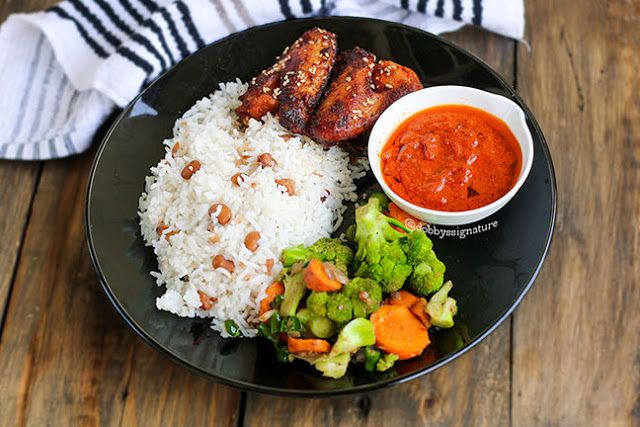
Supper menu
Chicken stock soup
Meat/ vegetable stew.
Boiled rice
Ice cream
EVALUATION:
1. What are the guidelines for meal planning?
2. What are the nutritional needs of the following people:
3. Convalescent, vegetarian, manual workers.
4. What is a menu card?
ASSIGNMENT
1. Write a menu card for any of the three meals of the day.
Objective Test:
1. One of the following may not influence meal planning
(a) Age (b) health (c) money (d) season (e) height
2. Excessive consumption of sweets by children can lead to
(a) good teeth (b) strong teeth (c) tooth decay (d) tooth hardness
3. Meals for children should be cooked by easily -------- method.(a) accepted
(b) manipulation
(c) attracted (d) consumed (e) digested.
4. Which of the following groups of people require increased intake of iron.
(a) Adolescents (b) Adolescent boys (c) Adolescent girls (d) The aged
(e) Manual worker.
5. A strict vegetarian will not eat any
(a) Food (b) vegetable protein (c) animal food (d) soya bean meals
(e) Carrot.
6. A person who is no longer sick but is gradually recovering after illness is.
(a) an invalid (b) a convalescent (c) a sick man (d) a sickler (e) a weak man.
7. Lactating mothers are -------- feeding their babies
(a) bottle (b) breast (c) over (d)under (e) always.
8. Person who do strenuous jobs are called
(a) Sedentary workers (b) manual worker (c) vegetarians (d) adults
(e) Activists
TOPIC: MEAL PLANNING
CONTENT: (a) Factors that influence meal planning.
(b) Guidelines for meal planning
(c) Meals for different groups.
(d) Menu card.
FACTORS THAT INFLUENCE MEAL PLANNING AND GUIDELINES FOR MEAL PLANNING
Factors that influence meal planning.
Meal planning involves choosing a menu or a list of foods that will be included in a meal.
1. Age of family member: The age of each family member influenced his/her nutritional needs.
2. Occupation or activities of family members: The work a person does influence his food needs. For instance, a manual worker e.g. laborer will require more energy foods than a sedentary worker (e.g. a clerk)
3. Health condition of family members: Certain foods are not suitable for certain health conditions. For instance, an obese will avoid those foods that can increase his/ her weight.
4. Size of the family: The size of the family member will determine the quality of meal to plan for.
5. Likes and dislikes of family members: The meal planner must try to plan for those dishes which the family members like.
6. Season of the year: Food in season is cheaper, fresher and tastier. It is therefore important for meal planner to consider the foods in season always.
7. Money available: The quality, quantity of food to plan for, depends on the income of a family. For instance, while a high income family may select fresh fish as their source of protein, a low income family may go for frozen fish or second class protein.
8. Equipment or facilities available: Food preparation requires certain facilities or equipment. So, when planning meals the homemaker must ensure that she plans those meals which she has facilities for their preparation?
9. Time available: Where little time is available she has to consider meals that are easy to prepare.
10. Locality or place where family resides: Certain types of food abound in some localities. The foods grown in a given locality will be readily available there and cheap too.
Guidelines for meal planning.
1. The meal must contain all the necessary food nutrients.
2. When possible, choose foods that contain a variety of nutrients.
3. Provide for the nutritional needs of all family members in the meal plan.
4. Avoid monotony by varying foods. Do not give one type of meal always. Use variety of foods.
5. Make use of foods in season. These are normally cheaper and could be of better quality than foods that are not in season.
6. Buy the best foods your money can afford.
7. Plan meals several days ahead of time so as to save money and time.
8. Buy good quality foods.
EVALUATION:
1. What are the guidelines for meal planning?
2. Factors that influence meal planning.
LESSON 8
MEALS FOR DIFFERENT GROUPS AND MENU CARD
MEALS FOR DIFFERENT GROUPS.
1. Young children: (Infants 0-1 year and toddlers 1-2 years): Young children are growing rapidly. They are also very active. They require food for growth and their activities.
2. Older children: These are also growing and active. They equally need body building and protective foods. They spend much energy at play. Therefore they require sufficient energy giving food in their diet.
3. Adolescents: Adolescence is a period for rapid growth. The adolescents therefore need proper feeding. Their food should be rich in protein, carbohydrates, minerals and vitamins.
4. Adolescent’s girls: They require increased intake of iron. This is to make up for that which they lose monthly during menstruation. Insufficient supply of iron in the girls ‘diet can result in anemia.
5. Adults: Members of this group have reached maturity and stopped growing. They therefore require food energy and maintenance rather than for growth. An adult’s diet should be balanced. It should also be suitable for his work, health and age. Over-weight must be avoided.
The following are special groups of adults, the manual worker, sedentary worker, pregnant woman, and lactating mothers.
6. Elderly people or the aged: Members of this group are often characterized by reduced physical activity. They therefore spend less energy. This means that the quantity of energy food required by the aged needs to be slightly decreased. Their needs for proteins, vitamins and minerals remain unchanged. Their food must be easy to chew and digested.
7. The sick and the convalescent
An invalid is a person who is sick. A convalescent is one who is no longer sick but is in the process of gradual recovery after illness. These two groups may have suffered breakdown of body tissues, loss of weight, loss of appetite and they could also be weak and lack certain nutrients.
Meals must be balanced. Meals should include good quantity proteins, vegetables, fruits for the repair of tissues and prevention of further infection. Meals must be cooked by the most easily digested methods such as boiling, stewing and steaming.
8. Vegetarian.
A strict vegetarian will not eat the flesh of animal foods e.g. meat, fish, egg and their product. Lacto-ovo vegetarians will not eat the flesh of animals and fish. They however drink milk and eat butter and cheese. In both cases they should combine numerous vegetable proteins, including soya beans.
PEOPLE WITH SPECIAL NUTRITIONAL NEEDS.
MENU CARD
A menu card is a card or sheet of paper that shows the meals or courses for breakfast, lunch and supper. It is commonly displaced in the dining halls or restaurants of hotels. In such places the menu card contains a number of meals from which a customer or guest can choose from family dining tables.
Guidelines for writing a menu card.
It should be eye-catching and attractive.
It should contain all the courses or dishes
It should not be over-crowded
The courses should be arranged in the order in which they are to be beaten.
Breakfast Menu
Chilled orange
Corn flakes/Quaker oat/pap
Fried/poached/boiled egg
Potato/yam/plantain chips.
Tea/coffee/chocolate toast.
Lunch menu
Nsala soup ( appetizer)
Meat/fish vegetable soup
Pounded yam/gari.
Pawpaw rings(dessert)
Supper menu
Chicken stock soup
Meat/ vegetable stew.
Boiled rice
Ice cream
EVALUATION:
1. What are the guidelines for meal planning?
2. What are the nutritional needs of the following people:
3. Convalescent, vegetarian, manual workers.
4. What is a menu card?
ASSIGNMENT
1. Write a menu card for any of the three meals of the day.
Objective Test:
1. One of the following may not influence meal planning
(a) Age (b) health (c) money (d) season (e) height
2. Excessive consumption of sweets by children can lead to
(a) good teeth (b) strong teeth (c) tooth decay (d) tooth hardness
3. Meals for children should be cooked by easily -------- method.(a) accepted
(b) manipulation
(c) attracted (d) consumed (e) digested.
4. Which of the following groups of people require increased intake of iron.
(a) Adolescents (b) Adolescent boys (c) Adolescent girls (d) The aged
(e) Manual worker.
5. A strict vegetarian will not eat any
(a) Food (b) vegetable protein (c) animal food (d) soya bean meals
(e) Carrot.
6. A person who is no longer sick but is gradually recovering after illness is.
(a) an invalid (b) a convalescent (c) a sick man (d) a sickler (e) a weak man.
7. Lactating mothers are -------- feeding their babies
(a) bottle (b) breast (c) over (d)under (e) always.
8. Person who do strenuous jobs are called
(a) Sedentary workers (b) manual worker (c) vegetarians (d) adults
(e) Activists
WEEK 6
LESSON 9
TOPIC: BUYING, PRESERVATION AND STORAGE OF FOOD
1. Factors to Consider when buying food
2. Food preservation and storage
FACTORS TO CONSIDER WHEN BUYING FOOD
INTRODUCTION
Food is expensive and can spoil easily too. Family food purchased should be thoroughly planned and carried out. It is equally important that food is properly stored. Proper preservation and storage will prevent wastage and ensure that food is safe and hygienic.
FACTORS TO CONSIDER WHEN BUYING FOOD
1. Size of the family: A family of three persons will require less food than a large family of ten.
2. The family food needs: it is necessary to consider the nutritional needs of the family, their food preferences, likes and dislikes. Some members may have dietary restrictions based on health.
3. Food preservation and storage facilities available to the family.
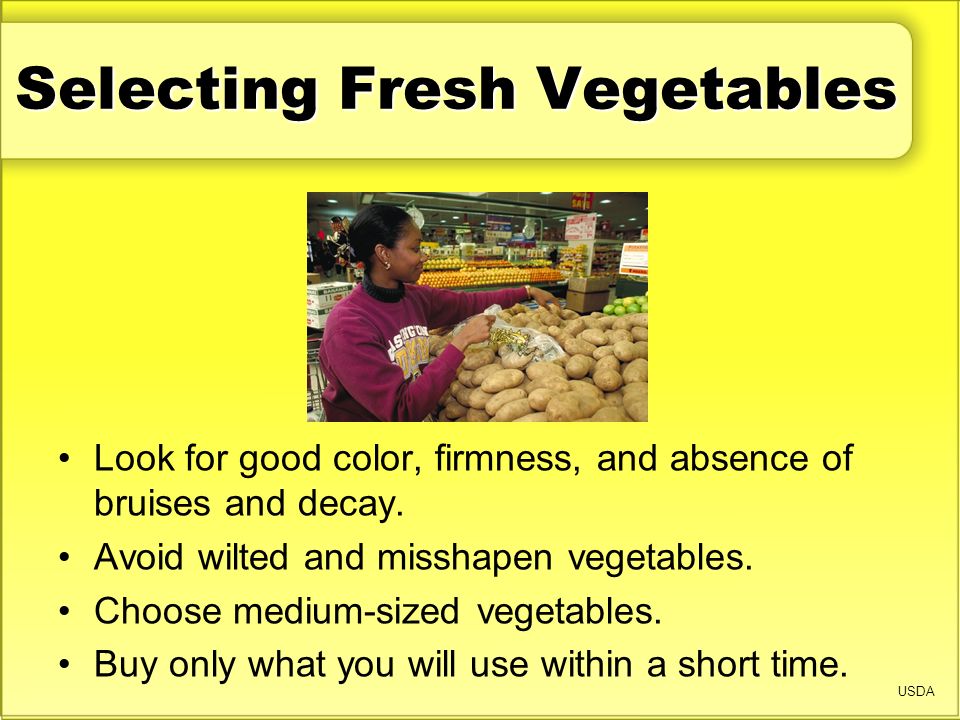
4. Quality of food: It is important to buy a good quality foodstuff.
5. Foods in season: these are cheapest and at their best.
6. Money available to the family.
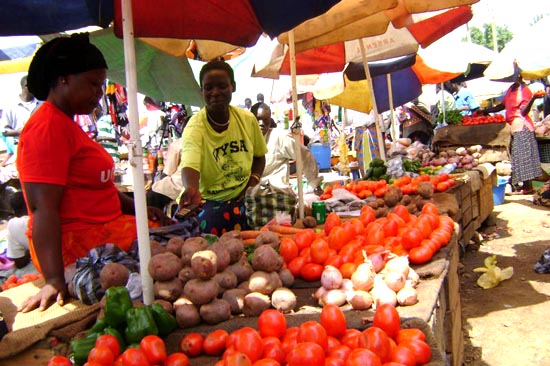
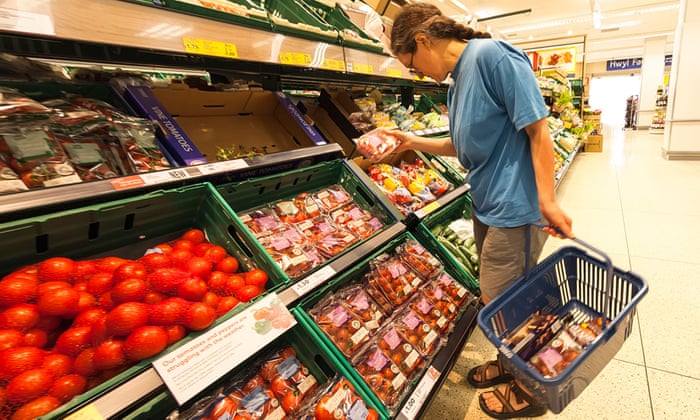
7. Where to buy food. Food can be purchased in open market, supermarkets or special stores, etc.
8. Buy where foodstuff is best and cheapest.
9. Buy non-perishable foods in bulk and store properly.
10. Purchase vegetables and fruits as and when needed if possible.
11. Avoid waste by purchasing just the foods which the family will eat.
12. Share bulk buying project with neighbors or friends whenever possible.
13. When to buy food: for instance, some perishable foodstuffs such as meat and vegetables are best purchased in the mornings in the open markets in Nigeria.
WISE BUYING PRACTICES:
1. Make a good shopping list.
2. Keep to the shopping list when buying.
3. Ensure that there are adequate storage facilities for the foodstuff to be purchased.
4. Buy foods that are in season.
5. Judge the quality of food before buying.
6. Judge values of food before buying.
7. Check measurement, e.g. cups and scale, when buying such foods as grains, pulses (maize, millet, rice, beans, etc) and gari.
8. Read labels on food containers, such as canned foods, bottled fat and oil etc. check expiry dates, food content, weights volume, etc.
9. Make bulk purchases when possible.
10. Compare values and prices in different stores and with different sellers.

IMPORTANCE OF BUYING GOOD QUALITY OF FOODSTUFFS:
Good quality foodstuff is one that is fresh and has a good appearance. It is not damaged. It is important to buy good quality foodstuff for the following reasons:
1. They are fresh and wholesome.
2. Their nutrient content is still intact.
3. They keep well in storage.
4. They are not yet attacked by food spoilage organisms.
5. They are appetizing and taste good.
6. They are economical because there is little or no wastage. This is because they are still fresh.
7. They have good appearance e.g. fresh fruits.
BULK PURCHASE OF FOOD:
Bulk buying is the process of buying foodstuffs in large quantities.
Advantages of bulk buying
1. It is economical and saves money because it is cheaper to buy large quantities than in small bits.
2. It saves time and energy: the home maker does not need to go to the market every day.
3. It enables the home-maker to buy food in season (the period of plenty).
4. It is very useful for food management in large families and institutions such as schools, hotel, etc.
5. It ensures that food is always in the house.
Disadvantages:
1. It can take much of the family income, and prevent purchase of other needed commodities.
2. One kind of food purchased can become monotonous to the family diet.
3. Lack of proper storage and management of food can lead to wastage.
4. Poor quality foodstuffs purchased in bulk will spoil in storage.
EVALUATION:
1. State five factors to consider when buying foods.
2. List four advantages of bulk purchasing.
LESSON 10
FOOD PRESERVATION AND STORAGE
Food Preservation
Food preservation is the caring for or treating food in such a way that it will keep in good condition for a long period of time.
Reasons for preserving food
1. Some foods are seasonal, that is, they are plenty at a time and not available at other periods.
2. In some farming communities, food is produces in abundance and need to be preserved for sale in cities or during the scarcity
3. Preservation is also necessary to prevent food spoilage.
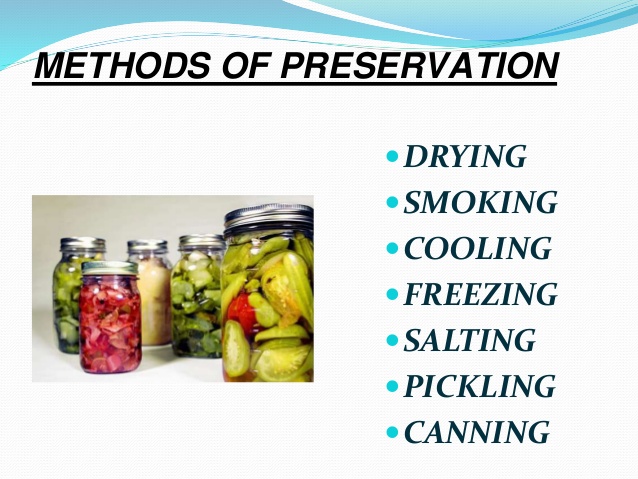
Food preservation methods
1. Solar or sun drying: This is a very effective way of preserving some vegetables, maize, beans, cassava, chips, etc.
2. Smoking: such foods as fish, meat and some root crops are preserved by smoking.
3. Freezing: is a method in which food is kept in freezer so that it becomes frozen very quickly.
4. Canning: this is done by sealing it in a air tight containers and applying heat. Commonly used for fruits and many vegetables.
Food storage
Food storage involves keeping preserved or purchased food in safe condition and suitable facilities for use.

Storage of perishable foods
Perishable foods are those foods that can spoil easily. Examples are fresh meat, fish, fruits, vegetables, milk and butter.
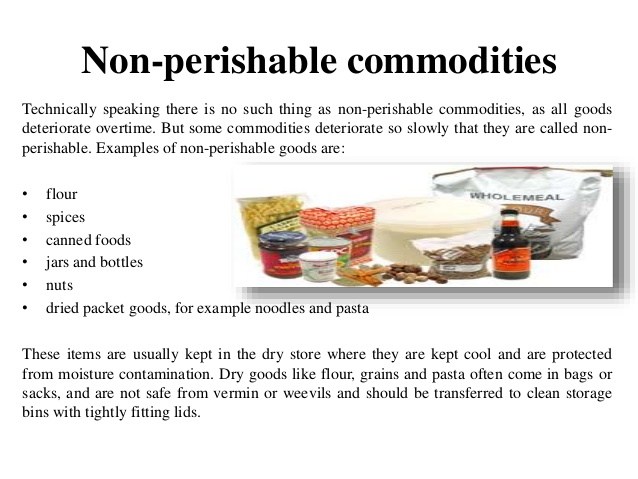
Non-perishable foods
Non-perishable foods are those foods that do not spoil easily. These can keep for a very long time if stored properly. They include rice, maize, beans, flours, sugar, yam, dried maize.
Importance of proper storage of food
1. It prevents food from spoilage.
2. It prevents loss of food nutrients.
3. It helps the home-makers to save money.
4. It saves time and energy of going to the market always.
Food storage facilities
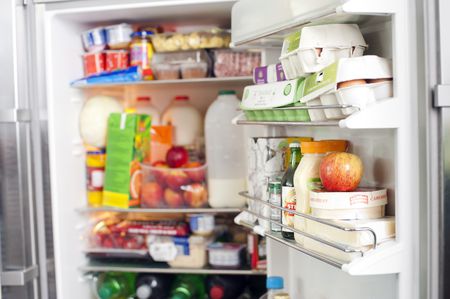
Proper food storage requires the use of good storage facilities. Storage facilities include plastic containers, food cupboards, larders, shelves and racks, refrigerators and freezers.
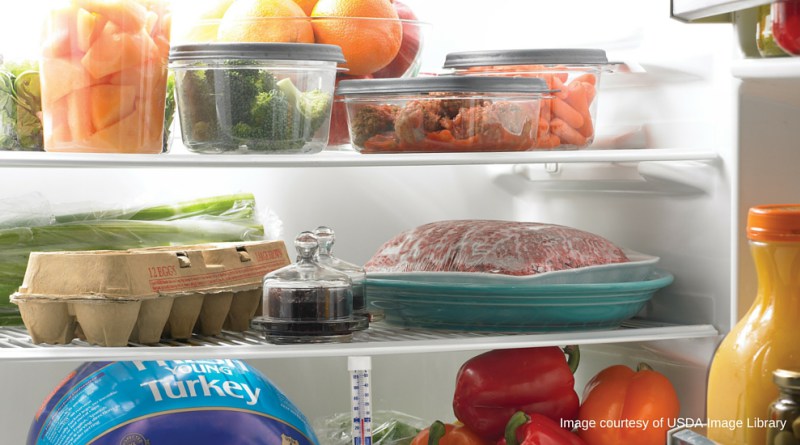
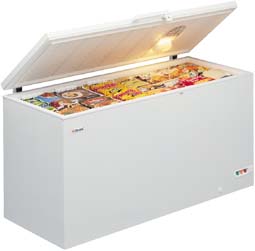
Refrigerators and Freezers
Food spoilage can be prevented by storing foodstuffs under cold conditions. This is because the bacteria or micro-organisms which cause food spoilage are generally inactive under very cold conditions.
Refrigeration is the process of keeping food cold, often in a refrigerator. A refrigerator is any appliance which removes heat from things (e.g. foods) and keeps them cold.
Freezers are used for storing large quantities of frozen foods.
EVALUATION:
1. Outline three methods of preservation.
2. State two methods of storage.
3. The process of buying food in large quantities is called
(a) Hire purchasing
(b) Wise purchasing
(c) Cheap purchasing
(d) Bulk purchasing
(e) Good purchasing
2. foods that can spoil easily are said to be
(a) non-perishable (b) perishable (c) bad (d) good (e) hard
3. Which of the following foods is perishable?
(a) Rice (b) Beans (c) Maize (d) Flours (e) Meat
4. Food spoilage can be prevented by storing foodstuffs under ________ conditions.
(a) warm (b) hot (c) cold (d) luke-warm (e) moist
5. ________ foods do not spoil easily.
(a) Edible (b) Non-edible (c) Perishable (d) Non-perishable (e) Hard
Assignment:
On Home economics New concepts for Nigerian Junior Secondary schools Book 3, Page 34----36.
TOPIC: BUYING, PRESERVATION AND STORAGE OF FOOD
1. Factors to Consider when buying food
2. Food preservation and storage
FACTORS TO CONSIDER WHEN BUYING FOOD
INTRODUCTION
Food is expensive and can spoil easily too. Family food purchased should be thoroughly planned and carried out. It is equally important that food is properly stored. Proper preservation and storage will prevent wastage and ensure that food is safe and hygienic.
FACTORS TO CONSIDER WHEN BUYING FOOD
1. Size of the family: A family of three persons will require less food than a large family of ten.
2. The family food needs: it is necessary to consider the nutritional needs of the family, their food preferences, likes and dislikes. Some members may have dietary restrictions based on health.
3. Food preservation and storage facilities available to the family.
4. Quality of food: It is important to buy a good quality foodstuff.
5. Foods in season: these are cheapest and at their best.
6. Money available to the family.
7. Where to buy food. Food can be purchased in open market, supermarkets or special stores, etc.
8. Buy where foodstuff is best and cheapest.
9. Buy non-perishable foods in bulk and store properly.
10. Purchase vegetables and fruits as and when needed if possible.
11. Avoid waste by purchasing just the foods which the family will eat.
12. Share bulk buying project with neighbors or friends whenever possible.
13. When to buy food: for instance, some perishable foodstuffs such as meat and vegetables are best purchased in the mornings in the open markets in Nigeria.
WISE BUYING PRACTICES:
1. Make a good shopping list.
2. Keep to the shopping list when buying.
3. Ensure that there are adequate storage facilities for the foodstuff to be purchased.
4. Buy foods that are in season.
5. Judge the quality of food before buying.
6. Judge values of food before buying.
7. Check measurement, e.g. cups and scale, when buying such foods as grains, pulses (maize, millet, rice, beans, etc) and gari.
8. Read labels on food containers, such as canned foods, bottled fat and oil etc. check expiry dates, food content, weights volume, etc.
9. Make bulk purchases when possible.
10. Compare values and prices in different stores and with different sellers.
IMPORTANCE OF BUYING GOOD QUALITY OF FOODSTUFFS:
Good quality foodstuff is one that is fresh and has a good appearance. It is not damaged. It is important to buy good quality foodstuff for the following reasons:
1. They are fresh and wholesome.
2. Their nutrient content is still intact.
3. They keep well in storage.
4. They are not yet attacked by food spoilage organisms.
5. They are appetizing and taste good.
6. They are economical because there is little or no wastage. This is because they are still fresh.
7. They have good appearance e.g. fresh fruits.
BULK PURCHASE OF FOOD:
Bulk buying is the process of buying foodstuffs in large quantities.
Advantages of bulk buying
1. It is economical and saves money because it is cheaper to buy large quantities than in small bits.
2. It saves time and energy: the home maker does not need to go to the market every day.
3. It enables the home-maker to buy food in season (the period of plenty).
4. It is very useful for food management in large families and institutions such as schools, hotel, etc.
5. It ensures that food is always in the house.
Disadvantages:
1. It can take much of the family income, and prevent purchase of other needed commodities.
2. One kind of food purchased can become monotonous to the family diet.
3. Lack of proper storage and management of food can lead to wastage.
4. Poor quality foodstuffs purchased in bulk will spoil in storage.
EVALUATION:
1. State five factors to consider when buying foods.
2. List four advantages of bulk purchasing.
LESSON 10
FOOD PRESERVATION AND STORAGE
Food Preservation
Food preservation is the caring for or treating food in such a way that it will keep in good condition for a long period of time.
Reasons for preserving food
1. Some foods are seasonal, that is, they are plenty at a time and not available at other periods.
2. In some farming communities, food is produces in abundance and need to be preserved for sale in cities or during the scarcity
3. Preservation is also necessary to prevent food spoilage.
Food preservation methods
1. Solar or sun drying: This is a very effective way of preserving some vegetables, maize, beans, cassava, chips, etc.
2. Smoking: such foods as fish, meat and some root crops are preserved by smoking.
3. Freezing: is a method in which food is kept in freezer so that it becomes frozen very quickly.
4. Canning: this is done by sealing it in a air tight containers and applying heat. Commonly used for fruits and many vegetables.
Food storage
Food storage involves keeping preserved or purchased food in safe condition and suitable facilities for use.
Storage of perishable foods
Perishable foods are those foods that can spoil easily. Examples are fresh meat, fish, fruits, vegetables, milk and butter.
Non-perishable foods
Non-perishable foods are those foods that do not spoil easily. These can keep for a very long time if stored properly. They include rice, maize, beans, flours, sugar, yam, dried maize.
Importance of proper storage of food
1. It prevents food from spoilage.
2. It prevents loss of food nutrients.
3. It helps the home-makers to save money.
4. It saves time and energy of going to the market always.
Food storage facilities
Proper food storage requires the use of good storage facilities. Storage facilities include plastic containers, food cupboards, larders, shelves and racks, refrigerators and freezers.
Refrigerators and Freezers
Food spoilage can be prevented by storing foodstuffs under cold conditions. This is because the bacteria or micro-organisms which cause food spoilage are generally inactive under very cold conditions.
Refrigeration is the process of keeping food cold, often in a refrigerator. A refrigerator is any appliance which removes heat from things (e.g. foods) and keeps them cold.
Freezers are used for storing large quantities of frozen foods.
EVALUATION:
1. Outline three methods of preservation.
2. State two methods of storage.
3. The process of buying food in large quantities is called
(a) Hire purchasing
(b) Wise purchasing
(c) Cheap purchasing
(d) Bulk purchasing
(e) Good purchasing
2. foods that can spoil easily are said to be
(a) non-perishable (b) perishable (c) bad (d) good (e) hard
3. Which of the following foods is perishable?
(a) Rice (b) Beans (c) Maize (d) Flours (e) Meat
4. Food spoilage can be prevented by storing foodstuffs under ________ conditions.
(a) warm (b) hot (c) cold (d) luke-warm (e) moist
5. ________ foods do not spoil easily.
(a) Edible (b) Non-edible (c) Perishable (d) Non-perishable (e) Hard
Assignment:
On Home economics New concepts for Nigerian Junior Secondary schools Book 3, Page 34----36.
WEEK 7
LESSON 11
TOPIC: KITCHEN EQUIPMENT AND UTENSILS
Factors to consider in choosing food preparation equipment and utensils and
guidelines for use of kitchen equipment and utensils.
2. Care of kitchen equipment and utensils.
FACTORS TO CONSIDER IN CHOOSING FOOD PREPARATION EQUIPMENT AND
UTENSILS AND GUIDELINES FOR USE OF KITCHEN EQUIPMENT AND UTENSILS.
Kitchen equipment and utensils are very important for food storage, preparation and cooking. Small cooking tools such as knives are called utensil while the large ones such as cookers are known as equipment.

Points to consider in choosing kitchen equipment and utensils.
1. The specific use of the equipment: The equipment to be chosen must be suitable for the job it is expected to do.
2. The money available for the purchase of the item.
3. The equipment must be durable.
4. It should be able to save labor, time and money.
5. It should be easy to use.
6. It should be easy to care for.
7. If a lid or cover is required for the utensil, it should fit closely.
8. The surface of the utensil should not be easily scratched, tarnished or chipped.
9. Handles of utensils should not be strong. They should be able to bear the weight of the utensil when it is full.
10. Handles of kitchen knives and spoons should be well fitted.
11. The home-maker must be skilled in the use of the utensil she is choosing.
12. The size of the family should determine the type of kitchen equipment to choose.
13. The space available in the home for storage of the equipment.
14. The needs of the family.
Different types of kitchen equipment and utensils.
Those utensils and equipment which are powered by electricity or gas are called kitchen appliances. There are also small and large kitchen appliances. Kitchen equipment and utensils are classified according to their uses in the home.
Measuring spoons, used for measuring smaller amounts of liquid and dry ingredients
1. Mixing equipment and utensil: These are used to blend and mix ingredients. They include mixing bowl, mixing spoons, rotary beaters, wire whisks, pestle and mortar, manual hand grinder, etc.

2. Cutting and chopping utensils: These are used for cutting and chopping food into smaller pieces. They include knives for cutting different types of food e.g. bread knife, chef’s knife, utility knife, paring knife.
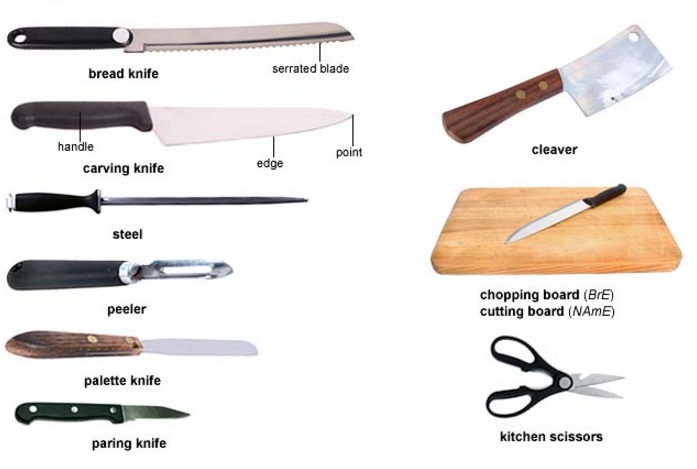
3. Other kitchen utensil: include colanders, strainers, slotted spoons, spatula, turner, tongs, cooking forks, cooking spoons etc.
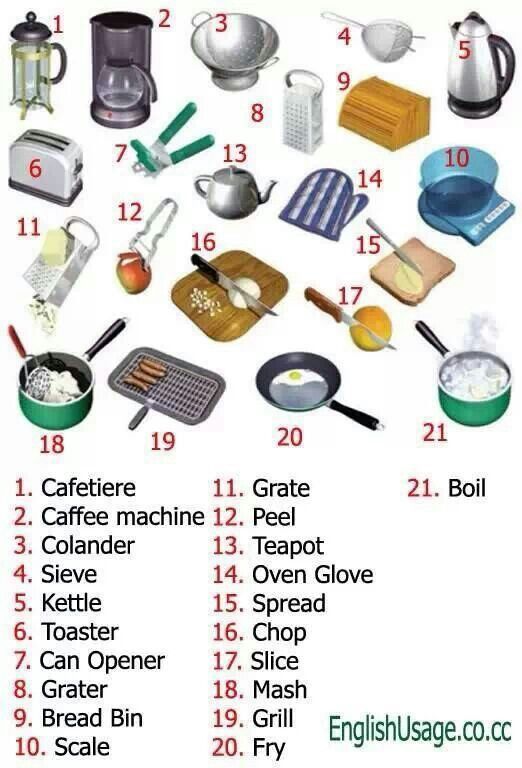
Cookware or top-of-range utensils and equipment.
These are used for cooking on top stoves, cooker/range, in the oven, or in the microwave. They are made of different materials affect the way you use and care for the utensils and equipment. The cookware include, frying pans, saucepans and pots, cake pans, muffin pan, bread pans, casserole, pressure cooker, etc.
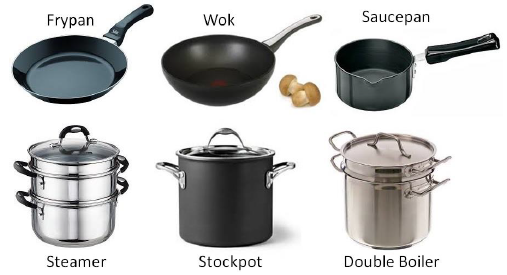
Microwave: It performs cooking task faster and more easily than a conventional oven. It can cook a meal in minutes and prepare a snack in seconds.
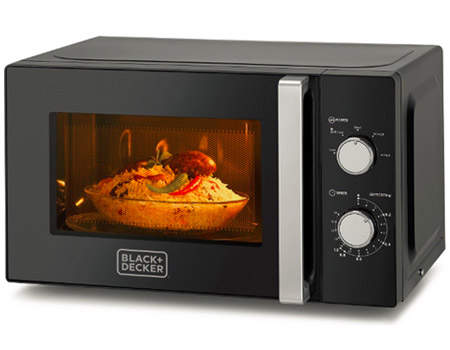
Ranges of cookers: These are used for cooking, baking and broiling. Some cookers use only gas or electricity, while others use both electricity and gas.
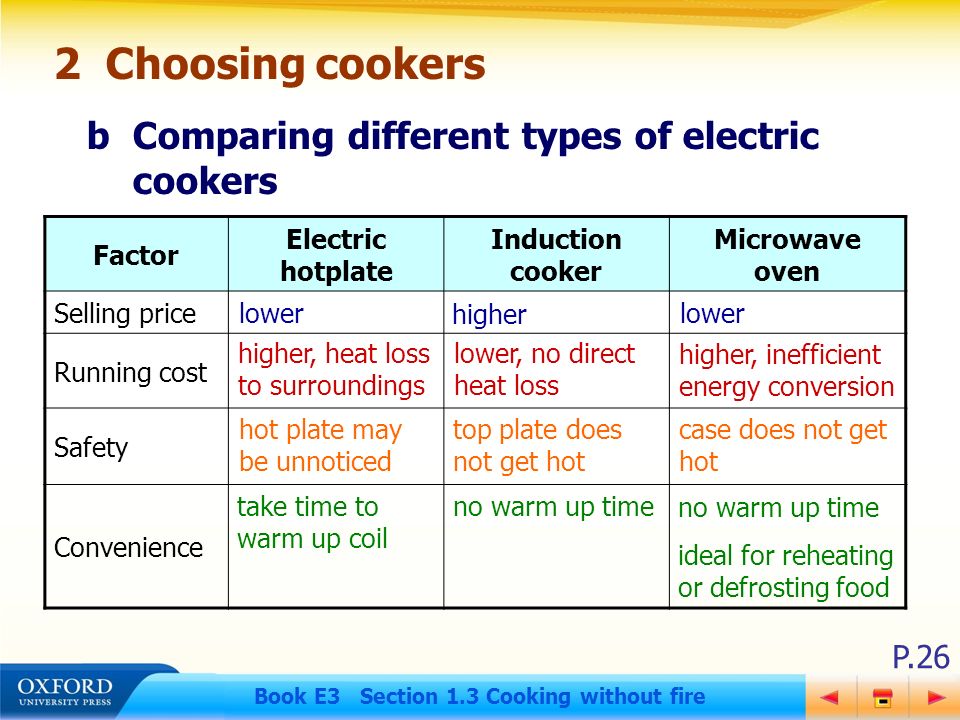
Refrigerator: Refrigerator plays very important role in food storage .The storage space of the refrigerator is divided into different parts as follows:

i. The freezer compartment: This is ice-cold. It is for storing very perishable foods such as fresh fish, meat, etc., foods stored here are frozen.
ii. The top-most shelf: This is nearest to the freezer. It is colder than any other part, except the freezer. It is suitable for cooked food.
iii. The middle shelf: This is next to the vegetable crisper. It is suitable for drinks, raw foods, bread, etc.
iv. Vegetable crisper: This is lowest apartment. It is just cool. It is suitable for storing raw fruits and vegetable
v. Door of the refrigerator: Storage spaces for such items as eggs, butter, cheese and drinks.
Guidelines for the use of refrigerator.
1. Place the refrigerator on a level surface.
2. Do not overcrowd the refrigerator; leave spaces between containers of food to allow for circulation of air for cooling.
3. Store only good quality food in the refrigerator, poor quality food will spoil easily, give bad odour and spoil other foods.
4. Wrap foods or put them in containers before placing in the refrigerator.
5. Do not open the refrigerator too often.
6. Keep the refrigerator clean always.
7. Do not use a sharp instrument to chip off the ice from the freezer compartment.
8. Inspect the refrigerator regularly to remove stale food.
9. Wipe off any spillage in the refrigerator immediately.
Deep Freezer.
While the refrigerator is divided into different parts with varying ranges of temperature, the freezer has one compartment with freezing temperature.

EVALUATION
1. State six points to consider when choosing kitchen equipment and utensils.
2. List the four compartment of a refrigerator.
ASSIGNMENT.
List any three of each of the following:
i. Measuring utensil
ii. Mixing utensil
iii. Top-of-range utensils and equipment.
LESSON 12
CARE OF KITCHEN EQUIPMENT AND UTENSILS.
Cleaning of refrigerator
1. Switch or turn off the refrigerator.
2. Remove everything from the refrigerator including food, racks, trays, etc.
3. Wash racks, trays and shelves in warm, soapy water.
4. Rinse thoroughly and wipe dry with clean non-fluffy cloth.
5. Clean the inside of the refrigerator with soft cloth and warm water.
6. Rinse the inside thoroughly and wipe dry.
7. Clean the outside of the refrigerator with soft cloth and warm soapy water.
8. Rinse thoroughly with warm water and wipe dry.
9. Replace racks trays and other parts.
10. Switch on the refrigerator.
11. Replace the food items when the refrigerator is cool enough.

Care of Deep Freezer.
1. Operation on the freezer.
2. Defrosting of the freezer.
3. Placement of food in the freezer.
4. Cleaning of the freezer.
5. Study the instructional handbook careful.
6. Do not throw away the instructional handbook.

General care for kitchen equipment and utensils.
1. Each piece of kitchen equipment and utensils has to be used correctly to obtain the best results.
2. The care of any piece of equipment and utensil should be based on the characteristics and used of the material.
3. Follow the manufacturer’s manual for the use and care of each equipment.
4. Repair appliances and utensil promptly.
5. Store kitchen equipment and utensil properly.
EVALUATION
1. Explain how to care for the deep freezer.
2. Explain the general care for kitchen equipment and utensils.
Activity: Visit the school kitchen and the staff room and clean up your kitchen refrigerators and the deep freezers.
Assignment:
Home economics New concepts for Nigerian Junior Secondary schools Book 3, Page 34----36
TOPIC: KITCHEN EQUIPMENT AND UTENSILS
Factors to consider in choosing food preparation equipment and utensils and
guidelines for use of kitchen equipment and utensils.
2. Care of kitchen equipment and utensils.
FACTORS TO CONSIDER IN CHOOSING FOOD PREPARATION EQUIPMENT AND
UTENSILS AND GUIDELINES FOR USE OF KITCHEN EQUIPMENT AND UTENSILS.
Kitchen equipment and utensils are very important for food storage, preparation and cooking. Small cooking tools such as knives are called utensil while the large ones such as cookers are known as equipment.
Points to consider in choosing kitchen equipment and utensils.
1. The specific use of the equipment: The equipment to be chosen must be suitable for the job it is expected to do.
2. The money available for the purchase of the item.
3. The equipment must be durable.
4. It should be able to save labor, time and money.
5. It should be easy to use.
6. It should be easy to care for.
7. If a lid or cover is required for the utensil, it should fit closely.
8. The surface of the utensil should not be easily scratched, tarnished or chipped.
9. Handles of utensils should not be strong. They should be able to bear the weight of the utensil when it is full.
10. Handles of kitchen knives and spoons should be well fitted.
11. The home-maker must be skilled in the use of the utensil she is choosing.
12. The size of the family should determine the type of kitchen equipment to choose.
13. The space available in the home for storage of the equipment.
14. The needs of the family.
Different types of kitchen equipment and utensils.
Those utensils and equipment which are powered by electricity or gas are called kitchen appliances. There are also small and large kitchen appliances. Kitchen equipment and utensils are classified according to their uses in the home.
Measuring spoons, used for measuring smaller amounts of liquid and dry ingredients
1. Mixing equipment and utensil: These are used to blend and mix ingredients. They include mixing bowl, mixing spoons, rotary beaters, wire whisks, pestle and mortar, manual hand grinder, etc.
2. Cutting and chopping utensils: These are used for cutting and chopping food into smaller pieces. They include knives for cutting different types of food e.g. bread knife, chef’s knife, utility knife, paring knife.
3. Other kitchen utensil: include colanders, strainers, slotted spoons, spatula, turner, tongs, cooking forks, cooking spoons etc.
Cookware or top-of-range utensils and equipment.
These are used for cooking on top stoves, cooker/range, in the oven, or in the microwave. They are made of different materials affect the way you use and care for the utensils and equipment. The cookware include, frying pans, saucepans and pots, cake pans, muffin pan, bread pans, casserole, pressure cooker, etc.
Microwave: It performs cooking task faster and more easily than a conventional oven. It can cook a meal in minutes and prepare a snack in seconds.
Ranges of cookers: These are used for cooking, baking and broiling. Some cookers use only gas or electricity, while others use both electricity and gas.
Refrigerator: Refrigerator plays very important role in food storage .The storage space of the refrigerator is divided into different parts as follows:
i. The freezer compartment: This is ice-cold. It is for storing very perishable foods such as fresh fish, meat, etc., foods stored here are frozen.
ii. The top-most shelf: This is nearest to the freezer. It is colder than any other part, except the freezer. It is suitable for cooked food.
iii. The middle shelf: This is next to the vegetable crisper. It is suitable for drinks, raw foods, bread, etc.
iv. Vegetable crisper: This is lowest apartment. It is just cool. It is suitable for storing raw fruits and vegetable
v. Door of the refrigerator: Storage spaces for such items as eggs, butter, cheese and drinks.
Guidelines for the use of refrigerator.
1. Place the refrigerator on a level surface.
2. Do not overcrowd the refrigerator; leave spaces between containers of food to allow for circulation of air for cooling.
3. Store only good quality food in the refrigerator, poor quality food will spoil easily, give bad odour and spoil other foods.
4. Wrap foods or put them in containers before placing in the refrigerator.
5. Do not open the refrigerator too often.
6. Keep the refrigerator clean always.
7. Do not use a sharp instrument to chip off the ice from the freezer compartment.
8. Inspect the refrigerator regularly to remove stale food.
9. Wipe off any spillage in the refrigerator immediately.
Deep Freezer.
While the refrigerator is divided into different parts with varying ranges of temperature, the freezer has one compartment with freezing temperature.
EVALUATION
1. State six points to consider when choosing kitchen equipment and utensils.
2. List the four compartment of a refrigerator.
ASSIGNMENT.
List any three of each of the following:
i. Measuring utensil
ii. Mixing utensil
iii. Top-of-range utensils and equipment.
LESSON 12
CARE OF KITCHEN EQUIPMENT AND UTENSILS.
Cleaning of refrigerator
1. Switch or turn off the refrigerator.
2. Remove everything from the refrigerator including food, racks, trays, etc.
3. Wash racks, trays and shelves in warm, soapy water.
4. Rinse thoroughly and wipe dry with clean non-fluffy cloth.
5. Clean the inside of the refrigerator with soft cloth and warm water.
6. Rinse the inside thoroughly and wipe dry.
7. Clean the outside of the refrigerator with soft cloth and warm soapy water.
8. Rinse thoroughly with warm water and wipe dry.
9. Replace racks trays and other parts.
10. Switch on the refrigerator.
11. Replace the food items when the refrigerator is cool enough.
Care of Deep Freezer.
1. Operation on the freezer.
2. Defrosting of the freezer.
3. Placement of food in the freezer.
4. Cleaning of the freezer.
5. Study the instructional handbook careful.
6. Do not throw away the instructional handbook.
General care for kitchen equipment and utensils.
1. Each piece of kitchen equipment and utensils has to be used correctly to obtain the best results.
2. The care of any piece of equipment and utensil should be based on the characteristics and used of the material.
3. Follow the manufacturer’s manual for the use and care of each equipment.
4. Repair appliances and utensil promptly.
5. Store kitchen equipment and utensil properly.
EVALUATION
1. Explain how to care for the deep freezer.
2. Explain the general care for kitchen equipment and utensils.
Activity: Visit the school kitchen and the staff room and clean up your kitchen refrigerators and the deep freezers.
Assignment:
Home economics New concepts for Nigerian Junior Secondary schools Book 3, Page 34----36
WEEK 8
LESSON 13
TOPIC: FOOD PREPARATION, COOKING METHODS
CONTENTS: (a) Food preparation, cooking methods
(b) Guidelines for use of cooking methods
FOOD PREPARATION, COOKING METHODS.
There are different ways of cooking food. Each method can give the food a different taste, texture, and appearance. These methods include: boiling, stewing, steaming, baking, roasting, and grilling.
Food must be properly cooked before they are eaten. Different foods require different cooking methods.

Some food preparation terms:
A. Mixing terms:
1. Stir: Use a spoon and a circular motion to turn food, e.g. sugar and flour.
2. Blend, Mix, and Combine: Stirring two or more ingredients together thoroughly.
3. Beat: Make mixtures smooth or beaten egg with a quick, over-and-over motion with a spoon or whisk.
4. Cream: Use a spoon, beater or mixer to combine ingredients until a soft and creamy result. This technique is often used to combine fat and sugar, to incorporate air.
5. Fold: Use a number or plastic scraper to gently combine a delicate mixture, such as beaten egg with other ingredients.
Food must be properly cooked before they are eaten. Different foods require different cooking methods.
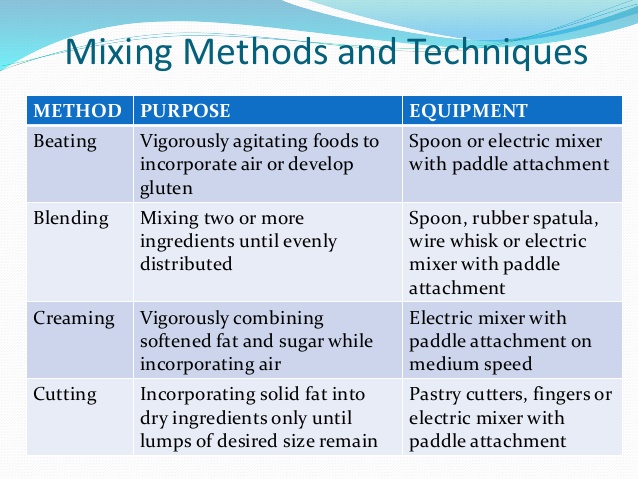
B. Cutting terms:
1. Chop: Cutting food into small, irregular pieces, e.g. Onions.
2. Mince: Chopping food into pieces that are as small as possible, e.g. Minced meat.
3. Cube: Cutting foods into evenly shaped pieces like the shape of a cube about 13mm on each side, e.g. Cubed carrot.
4. Dice. Cutting into evenly shaped pieces about 6mm on each side.
5. Shred: Cut food into long, thin piece, using the large holes of a greater or a knife, e.g., shredding of boiled cassava, carrot, coconut, etc.
6. Pare: Cutting off the outside covering of a fruit of vegetable, using a peeler or a paring knife, e.g. Water melon, pawpaw.
7. Grate: Rub food over a greater on the side with small holes, e.g. grating cassava for gari.
8. Slice: Cutting the food into thin pieces, e.g. Bread meat.

Other food preparation terms are:
1. Coat: Covering the surface of a food with a dry ingredient such as sugar, flour, dry bread crumbs, and pepper.
2. Garnish: Decorating a finished dish with a small food item .For instance, garnishing a plate of
jollof rice with peas, green beans, or any other type of vegetables.
3. Grease: Rubbing lightly with a fat, for instance, greasing a cake pan with margarine.
4. Seasoning: Adding seasonings to improve the flavor or taste of a food. Seasonings include salt, pepper, spices, etc.
5. Strain: Removing solid particles from liquid by pouring through a sieve.
6. Drain: Removing excess water or liquid from food by placing it in a sieve or colander.
7. Puree: Mashing food until it is smooth, using pestle and mortar or hand grinder or blender, e.g. tomatoes.
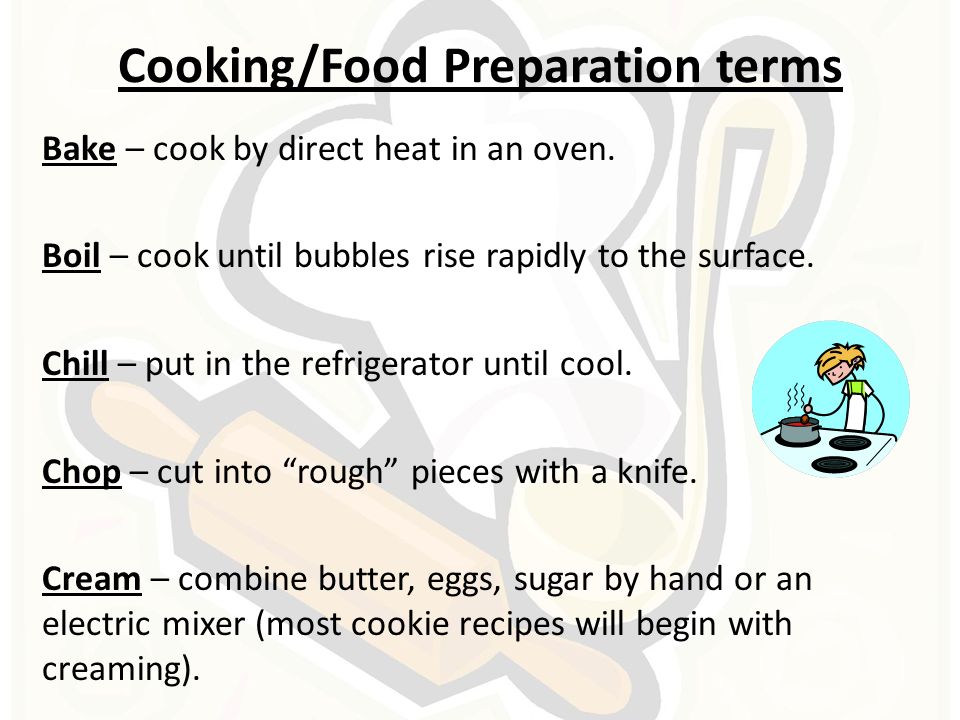
EVALUATION:
1. Define the following terms in food preparation methods
i. Stir ii .Seasoning
iii. Beat iv. Garnish
v. shred vi. Fold
vii. Puree viii. Chop ix. Slice
READING ASSIGNMENT.
Read Home Economics New Concepts page 97-102 by Popoola O.O
LESSON 14
REASONS FOR COOKING FOOD.
1. Cooking makes food easier to eat.
2. It makes food more appetizing and palatable.
3. It makes food easier to digest.
4. It makes food safe to eat. Cooking destroys many harmful micro- organisms or germs in the food.
5. Some foods keep longer when cooked.
6. Cooking improves the appearance of food.
7. It improves the taste of food.
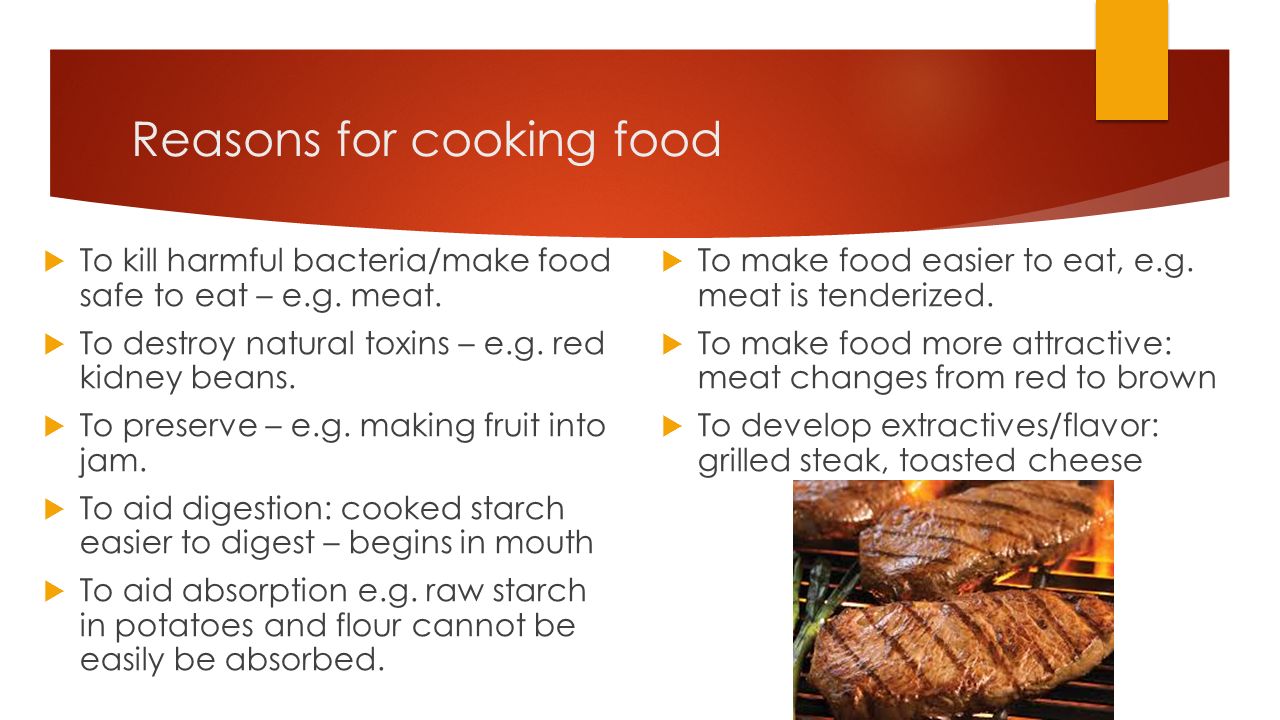
Guidelines for the use of cooking method / Points to consider in choosing a cooking method
1.Type of food being cooked:[/b] Various foods require different methods of cooking. E.g. Cakes are baked while moinmoin is steamed.
2.Loss of nutrients: Some nutrients are lost by certain methods of cooking. For instance, water soluble vitamins in foods will be lost if the foods are boiled and the cooking water is discarded.
3.Age and health of persons to eat the food: Children and sick person need foods to be cooked by the most easily digested methods such as steaming and boiling.
4.Facilities available for cooking: For instance, an oven is required for baking.
5.Time available: Some methods require longer time and attention than others
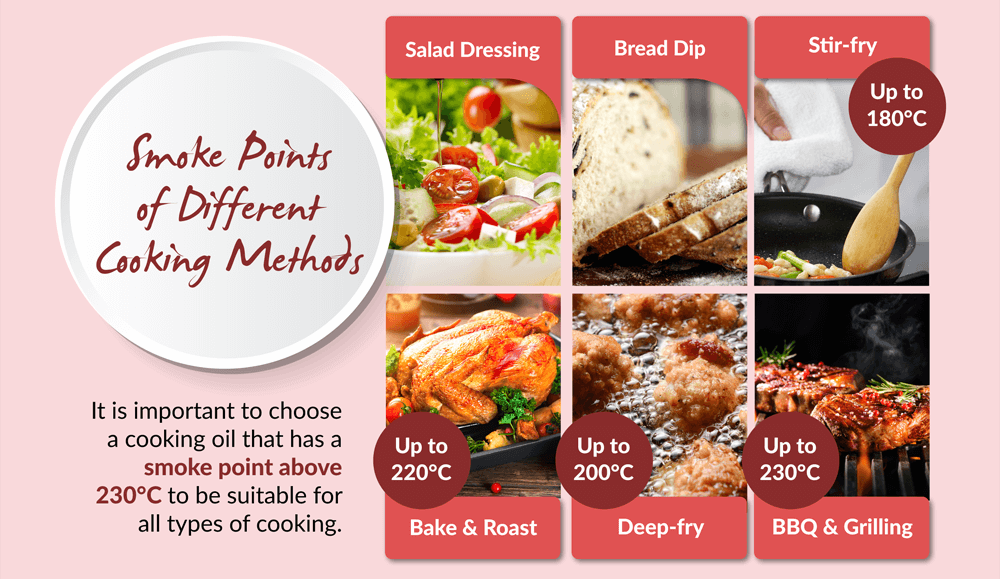
EVALUATION.
1. State five reasons for cooking food.
2. State the guidelines for the use of cooking method.
ASSIGNMENT.
Workbook on Home Economics New Concepts for JSS Bk 3 (UBE 9) byPopoola O.O .Pgs. 37—38.
TOPIC: FOOD PREPARATION, COOKING METHODS
CONTENTS: (a) Food preparation, cooking methods
(b) Guidelines for use of cooking methods
FOOD PREPARATION, COOKING METHODS.
There are different ways of cooking food. Each method can give the food a different taste, texture, and appearance. These methods include: boiling, stewing, steaming, baking, roasting, and grilling.
Food must be properly cooked before they are eaten. Different foods require different cooking methods.
Some food preparation terms:
A. Mixing terms:
1. Stir: Use a spoon and a circular motion to turn food, e.g. sugar and flour.
2. Blend, Mix, and Combine: Stirring two or more ingredients together thoroughly.
3. Beat: Make mixtures smooth or beaten egg with a quick, over-and-over motion with a spoon or whisk.
4. Cream: Use a spoon, beater or mixer to combine ingredients until a soft and creamy result. This technique is often used to combine fat and sugar, to incorporate air.
5. Fold: Use a number or plastic scraper to gently combine a delicate mixture, such as beaten egg with other ingredients.
Food must be properly cooked before they are eaten. Different foods require different cooking methods.
B. Cutting terms:
1. Chop: Cutting food into small, irregular pieces, e.g. Onions.
2. Mince: Chopping food into pieces that are as small as possible, e.g. Minced meat.
3. Cube: Cutting foods into evenly shaped pieces like the shape of a cube about 13mm on each side, e.g. Cubed carrot.
4. Dice. Cutting into evenly shaped pieces about 6mm on each side.
5. Shred: Cut food into long, thin piece, using the large holes of a greater or a knife, e.g., shredding of boiled cassava, carrot, coconut, etc.
6. Pare: Cutting off the outside covering of a fruit of vegetable, using a peeler or a paring knife, e.g. Water melon, pawpaw.
7. Grate: Rub food over a greater on the side with small holes, e.g. grating cassava for gari.
8. Slice: Cutting the food into thin pieces, e.g. Bread meat.
Other food preparation terms are:
1. Coat: Covering the surface of a food with a dry ingredient such as sugar, flour, dry bread crumbs, and pepper.
2. Garnish: Decorating a finished dish with a small food item .For instance, garnishing a plate of
jollof rice with peas, green beans, or any other type of vegetables.
3. Grease: Rubbing lightly with a fat, for instance, greasing a cake pan with margarine.
4. Seasoning: Adding seasonings to improve the flavor or taste of a food. Seasonings include salt, pepper, spices, etc.
5. Strain: Removing solid particles from liquid by pouring through a sieve.
6. Drain: Removing excess water or liquid from food by placing it in a sieve or colander.
7. Puree: Mashing food until it is smooth, using pestle and mortar or hand grinder or blender, e.g. tomatoes.
EVALUATION:
1. Define the following terms in food preparation methods
i. Stir ii .Seasoning
iii. Beat iv. Garnish
v. shred vi. Fold
vii. Puree viii. Chop ix. Slice
READING ASSIGNMENT.
Read Home Economics New Concepts page 97-102 by Popoola O.O
LESSON 14
REASONS FOR COOKING FOOD.
1. Cooking makes food easier to eat.
2. It makes food more appetizing and palatable.
3. It makes food easier to digest.
4. It makes food safe to eat. Cooking destroys many harmful micro- organisms or germs in the food.
5. Some foods keep longer when cooked.
6. Cooking improves the appearance of food.
7. It improves the taste of food.
Guidelines for the use of cooking method / Points to consider in choosing a cooking method
1.Type of food being cooked:[/b] Various foods require different methods of cooking. E.g. Cakes are baked while moinmoin is steamed.
2.Loss of nutrients: Some nutrients are lost by certain methods of cooking. For instance, water soluble vitamins in foods will be lost if the foods are boiled and the cooking water is discarded.
3.Age and health of persons to eat the food: Children and sick person need foods to be cooked by the most easily digested methods such as steaming and boiling.
4.Facilities available for cooking: For instance, an oven is required for baking.
5.Time available: Some methods require longer time and attention than others
EVALUATION.
1. State five reasons for cooking food.
2. State the guidelines for the use of cooking method.
ASSIGNMENT.
Workbook on Home Economics New Concepts for JSS Bk 3 (UBE 9) byPopoola O.O .Pgs. 37—38.
WEEK 9
LESSON 15
TOPIC: FOOD PREPARATION METHODS.
CONTENTS: (a) Procedures for use of cooking methods.
(b) Preparation of simple dishes.
PROCEDURES FOR USE OF COOKING METHODS.
METHODS OF COOKING FOOD.
1. BOILING: This is the process of cooking food in boiling water, until it is tender. Many foods can be boiled e.g. yam, rice, beans, meat, plantain, etc.
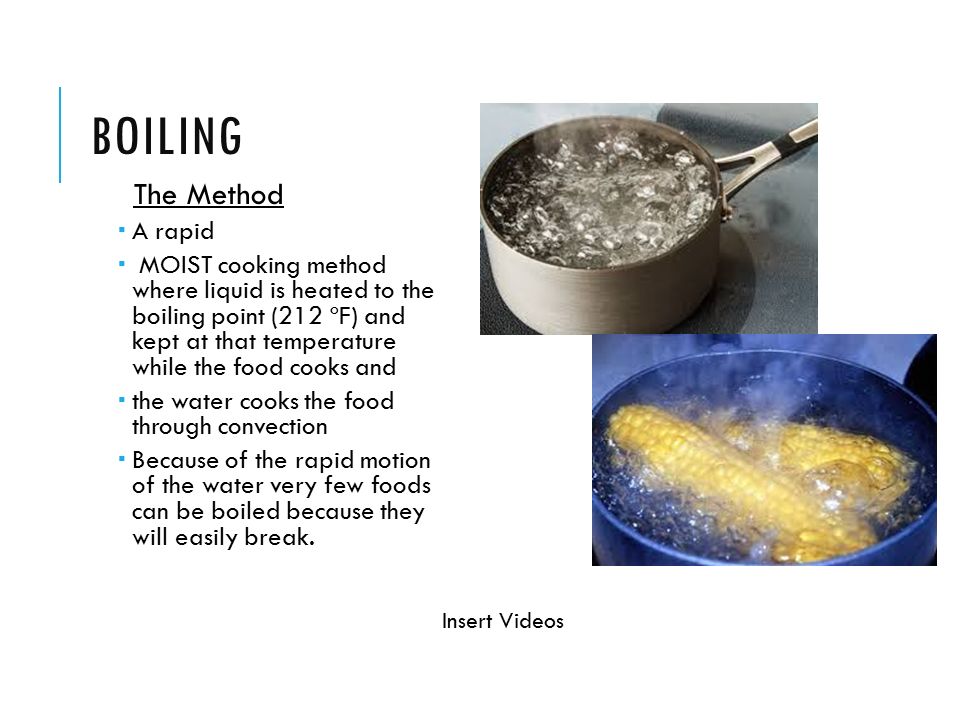
Guidelines for boiling:
1. The water should be made to cover the food being cooked.
2. The lid should fit the pot properly to prevent theloss of steam and heat.
3. Avoid over cooking the food.
4. Stain the water after boiling the food.
Advantages of boiling
i. It is an easy and quick method of cooking.
ii.It makes food soft and easy to digest.
iii. Many food can be cooked by boiling
Disadvantages of boiling.
i. Some food nutrients e.g., water-soluble vitamins can be lost in the boiling water.
2. STEWING:This is the method of cooking food slowly or at a low heat in a small quality of water, in a covered pot for a long time. It is commonly used for making soups.
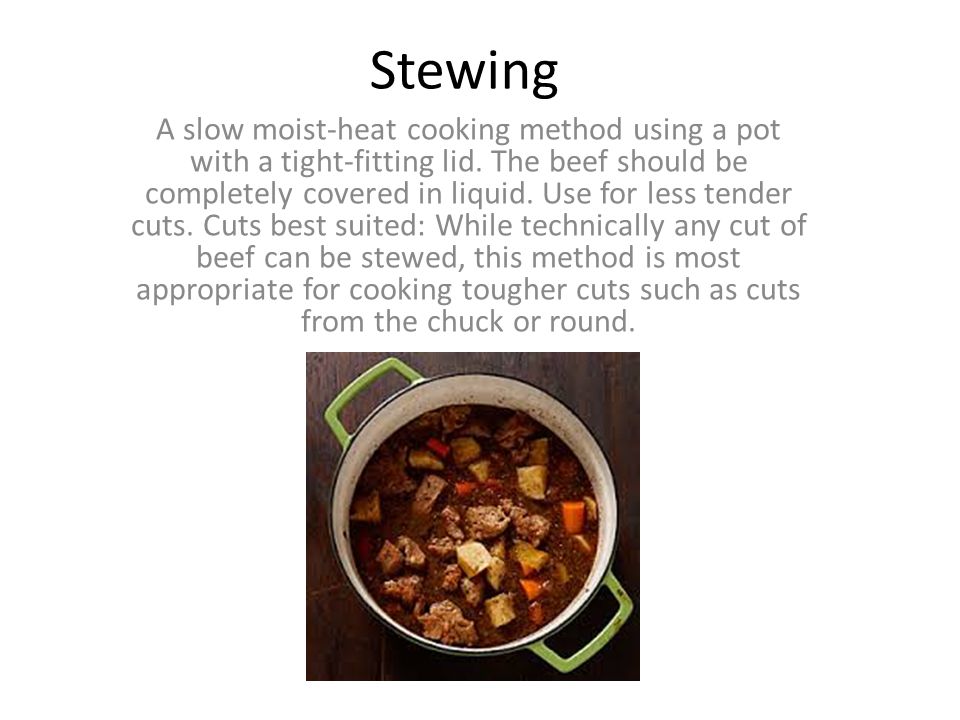
Advantages of stewing.
i. Food nutrients are conserved or retained in the stewing liquid.
ii. Stewed foods are easily digested.
Iii. Flavours of foods is retained in stewing.
Disadvantages of stewing
i.It is a long and slow method of cooking.
ii. It requires longer time than boiling.
3. STEAMING: This is the method of cooking food in the steam of boiling water. There is no direct contact between the food and the boiling water.

Guidelines for steaming
1. The steamer must fit the pan. The lid must fit tightly to prevent escape of steam.
2.The water in the lower container or round the vessels container or round the vessels containing the food must be boiling all the time.
3.All foods other than vegetables should be protected by wrapping with water proof, so that condensed steam will not make the food sodden.
4. The water must be replenished as it boils away.
5. The time of cooking must be calculated according to the type of food being cooked.
Advantages of steaming.
i. Steamed foods are easily digested. Steaming is therefore suitable for cooking for children, invalids, convalescents, and the aged.
Ii. Nutrients is retained in the food.
Disadvantages of steaming.
i. Steaming takes longer time than boiling. It therefore consumes more fuel.
ii. Steamed tends to lack flavor. They require seasonings.
5. FRYING:This is the method of cooking food in hot oil.

Types of frying.
i. Shallow fat frying: The food is fried in a little oil or fat. A frying pan is used and the oil just covers the bottom of the pan. Foods cooked by this method are meat, fish, pancakes, eggs etc.
ii.Sauteing: This is tossing food lightly in a small amount of fat or oils e.g.some vegetables.
Iii.Deep fat frying: Food is fried in plenty of oil or fat. A deep pan or pot is used. Foods cooked this way are akara balls, chin-chin, yam slices, doughnut, etc.
Iv. Dry frying: This involves frying food in its own oil, e.g. Bacon.
Guidelines for frying
1. Determine the type of frying suitable for the food to be fried.
2. Use good quality oil.
3. Ensure that the oil is hot enough before putting the food.
4. Fry only a small quantity of food at a time.
5. Drain as much water as possible from foods before placing them in hot oil.
6. Do not turn the food frequently while it is frying to prevent breaking.
7. Do not cover fried food when it is still hot, otherwise, steam will accumulate and make the food soggy or wet.
8. Fried foods should be served hot in order to enjoy its full flavor.
Advantages of frying.
i. It is a quick method of cooking.
ii. Fried foods are very tasty and flavored
Disadvantages of frying.
1. Frying requires careful and constant attention.
2. Fried foods are less easily digested. Frying is therefore not suitable for cooking for invalids and convalescents or the aged.
6. ROASTING: This is a method of cooking food in a dry heat by any of the following:
i. By an open fire or over heated charcoal, e.g. roasted maize, plantain, etc.
ii. In heated sand or ash e.g. roasted yams, potatoes, cocoyam etc.
iii. In an oven or enclosed space with hot fat or oil poured over the food, e.g. roast chicken or large piece of meat.
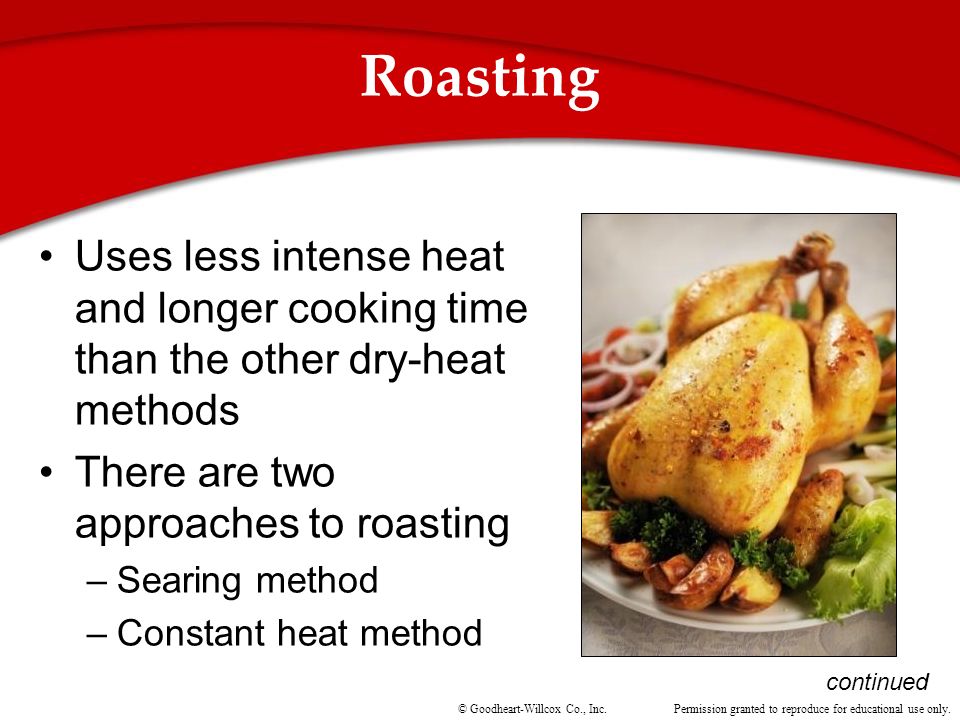
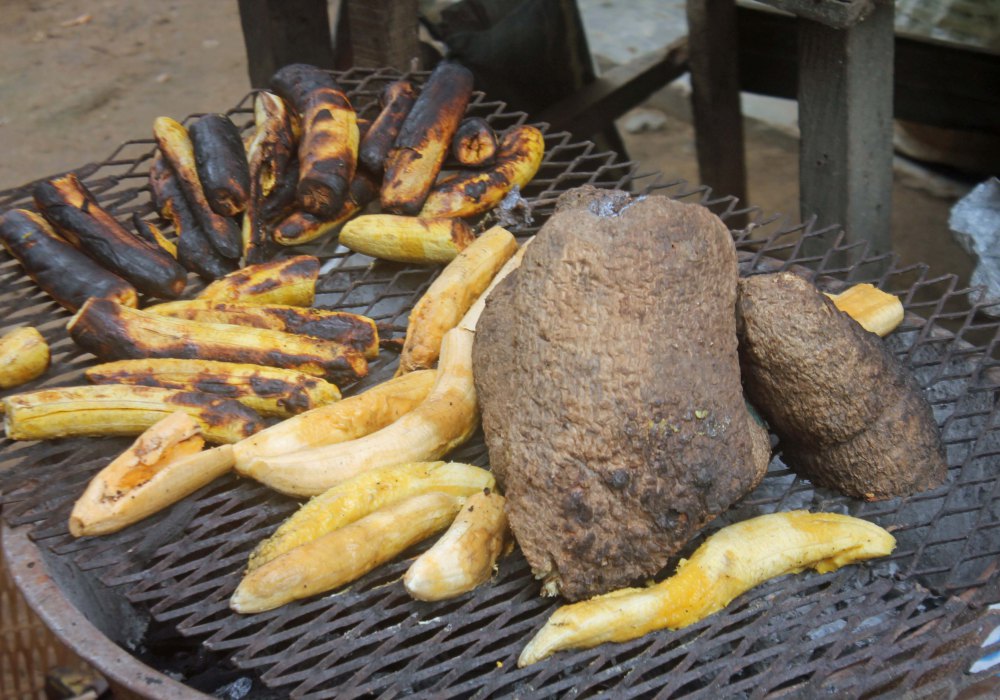
Advantages of roasting
i. Roasting develops good flavor in food.
ii. Roasting in open fire is an easy and fast method of cooking.
Disadvantages of roasting.
i. Foods tend to shrink during roasting.
ii. It requires constant attention.
7. BAKING: This is a method of cooking food with dry heat in an enclosed space. The air within the enclosed space is heated up to the required temperature. The heated air cooks the food. Baking is done in ovens.
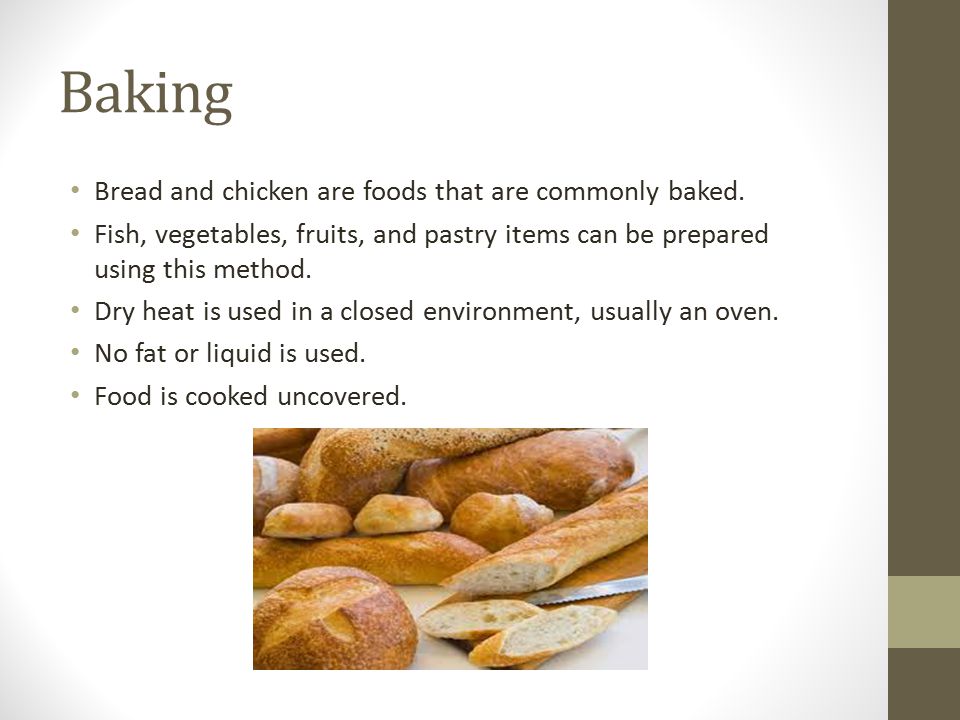
Guidelines for baking
1. The oven must be cleaned and heated to correct temperature before putting the food.
2. Baking sheets and pans must be clean and greased properly.
3. Pans must be properly and evenly distributed in the oven for even circulation or air.
4. Avoid frequent opening of the oven. This causes cold air to rush in and lower the oven temperature.
5. Time your baking and monitor it properly.
Disadvantages of baking.
i. It requires attention.
ii. It requires careful temperature control.
8. GRILLING: This is the method of cooking food over, under or in front of a smokeless fire. Grilling can also be done beneath the glowing reflector of a gas or electric grill.
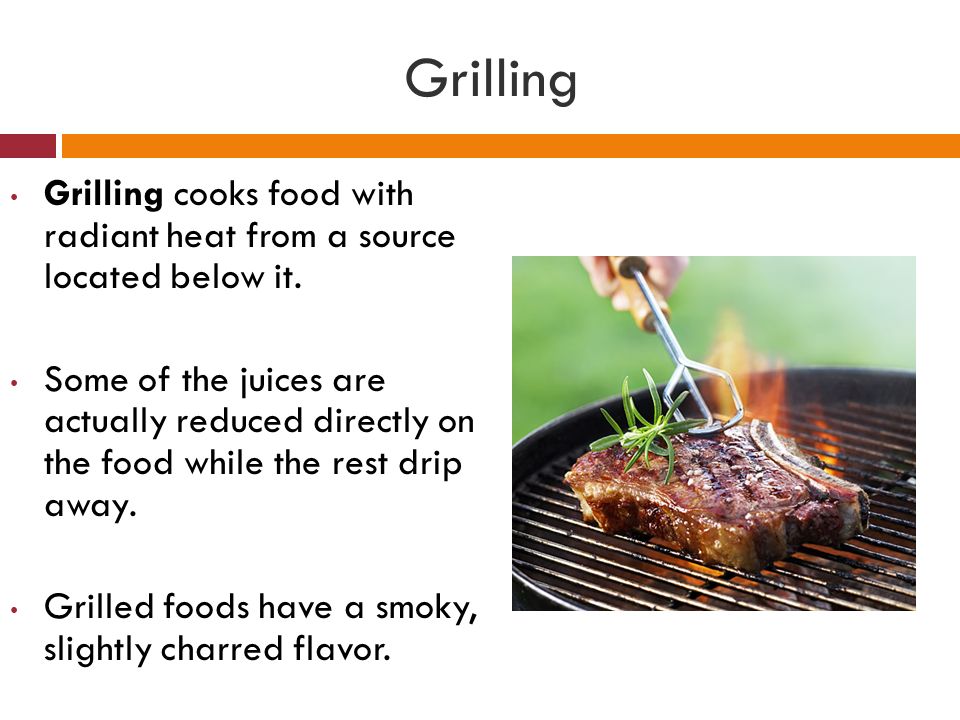
Advantages of grilling.
i. It is a quick method of cooking.
ii. Grilled foods can digest easily.
Disadvantages of grilling.
i. Grilling requires careful and constant attention.
EVALUATION.
1. Which of the following is not a method of cooking food?
(a) Boiling (b) wing (c) Steaming (d) Baking (e) Garnishing.
2. The process of cooking food over boiling water is called.
(a) Frying (b) roasting (c) baking (d) grilling (e) boiling.
3. ----------- foods are easily digested
(a) Fried( b) Roasted (c) Grilled (d) Steamed (e) Baked.
4. Foods cooked by -------- do not digest easily
(a) Boiling (b) steaming (c) stewing (d) grilling (e) frying.
5. Baking is often done in
(a) Refrigerator (b) cooker (c) oven (d) sink (e) stove.
6. Meals for children, invalids and the aged should be cooked by
(a) frying or grilling (b) boiling or steaming (c) boiling or frying (d) roasting or baking (e) steaming or frying
LESSON 16
PREPARATION OF SIMPLE DISHES.
PANCAKE (FRYING).
¼ litre of milk
100 flour
1 egg
A pinch of salt.
½ cup of vegetable oil
Method.
1. Place the flour into a mixing bowl.
2. Mix the egg and milk in a bowl.
3. Gradually, add the egg, milk into the flour and mix/whisk.
4. Continue whisking until there are no lumps.
5. Add salt and whisk again.
6. Leave the batter to stand for about 10 minutes.
7. Put about 1 tablespoonful of vegetable oil in dry frying pan. Heat gently.
8. Pour in about 2 tablespoonful of batter into the frying pan. Tip the pan so that the batter spreads all over it.
9. Cook the pancakes slowly until it has set.
10. Turn the pancake with a turner.
11. Cook the other side for about two minutes sprinkles with sugar and roll of fold.
12. Serve the pancake on a flat plate.
13. Cook the remaining mixture in the same way and serve hot.
https://youtu.be/LWuuCndtJr0
CAKE MAKING. ( BAKING)
Creaming method.
Basic Recipe.
200 g flour 125 g fat
125 g sugar 75 ml milk to mix
2 eggs 1 teaspoon baking powder
Method.
1. Cream sugar and fat together until soft, white and creamy. Use a wooden spoon and work lightly, with a circular motion.
2. Add the beaten eggs by degrees, continuing the creaming between each addition. If mixture begins to curdle add a little flour to make it smooth again.
3. Using a metal spoon, fold in one third of the flour adding a little milk if necessary. Repeat with the second one-third of the flour, add a little milk.
4. Add any fruit listed in the recipe and final third of the flour to which the baking powder has been added. Add more milk if necessary to keep mixture to a soft dropping consistency, i.e it should be soft enough to drop from the spoon. Add the essence.
5. Bake in little a moderate oven-small cake for 20 minutes and a little longer for larger cakes.
https://youtu.be/NkV3xKUUd1s
EGG CUSTARD (STEAMED OR BAKED)
Recipe
¼ liter of milk A pinch of salt
½ cup of vegetable oil
100 g flour
1 egg
Method
1. Put the sugar into mixing bowl.
2. Break the egg into the bowl.
3. Add milk and vanilla essence slowly, and whisk.
4. Pour into a greased Pyrex dish or any other container suitable for steaming.
5. Place in a steamer.
6. Steam for about 30 minutes or until the custard is set.
7. Serve hot.
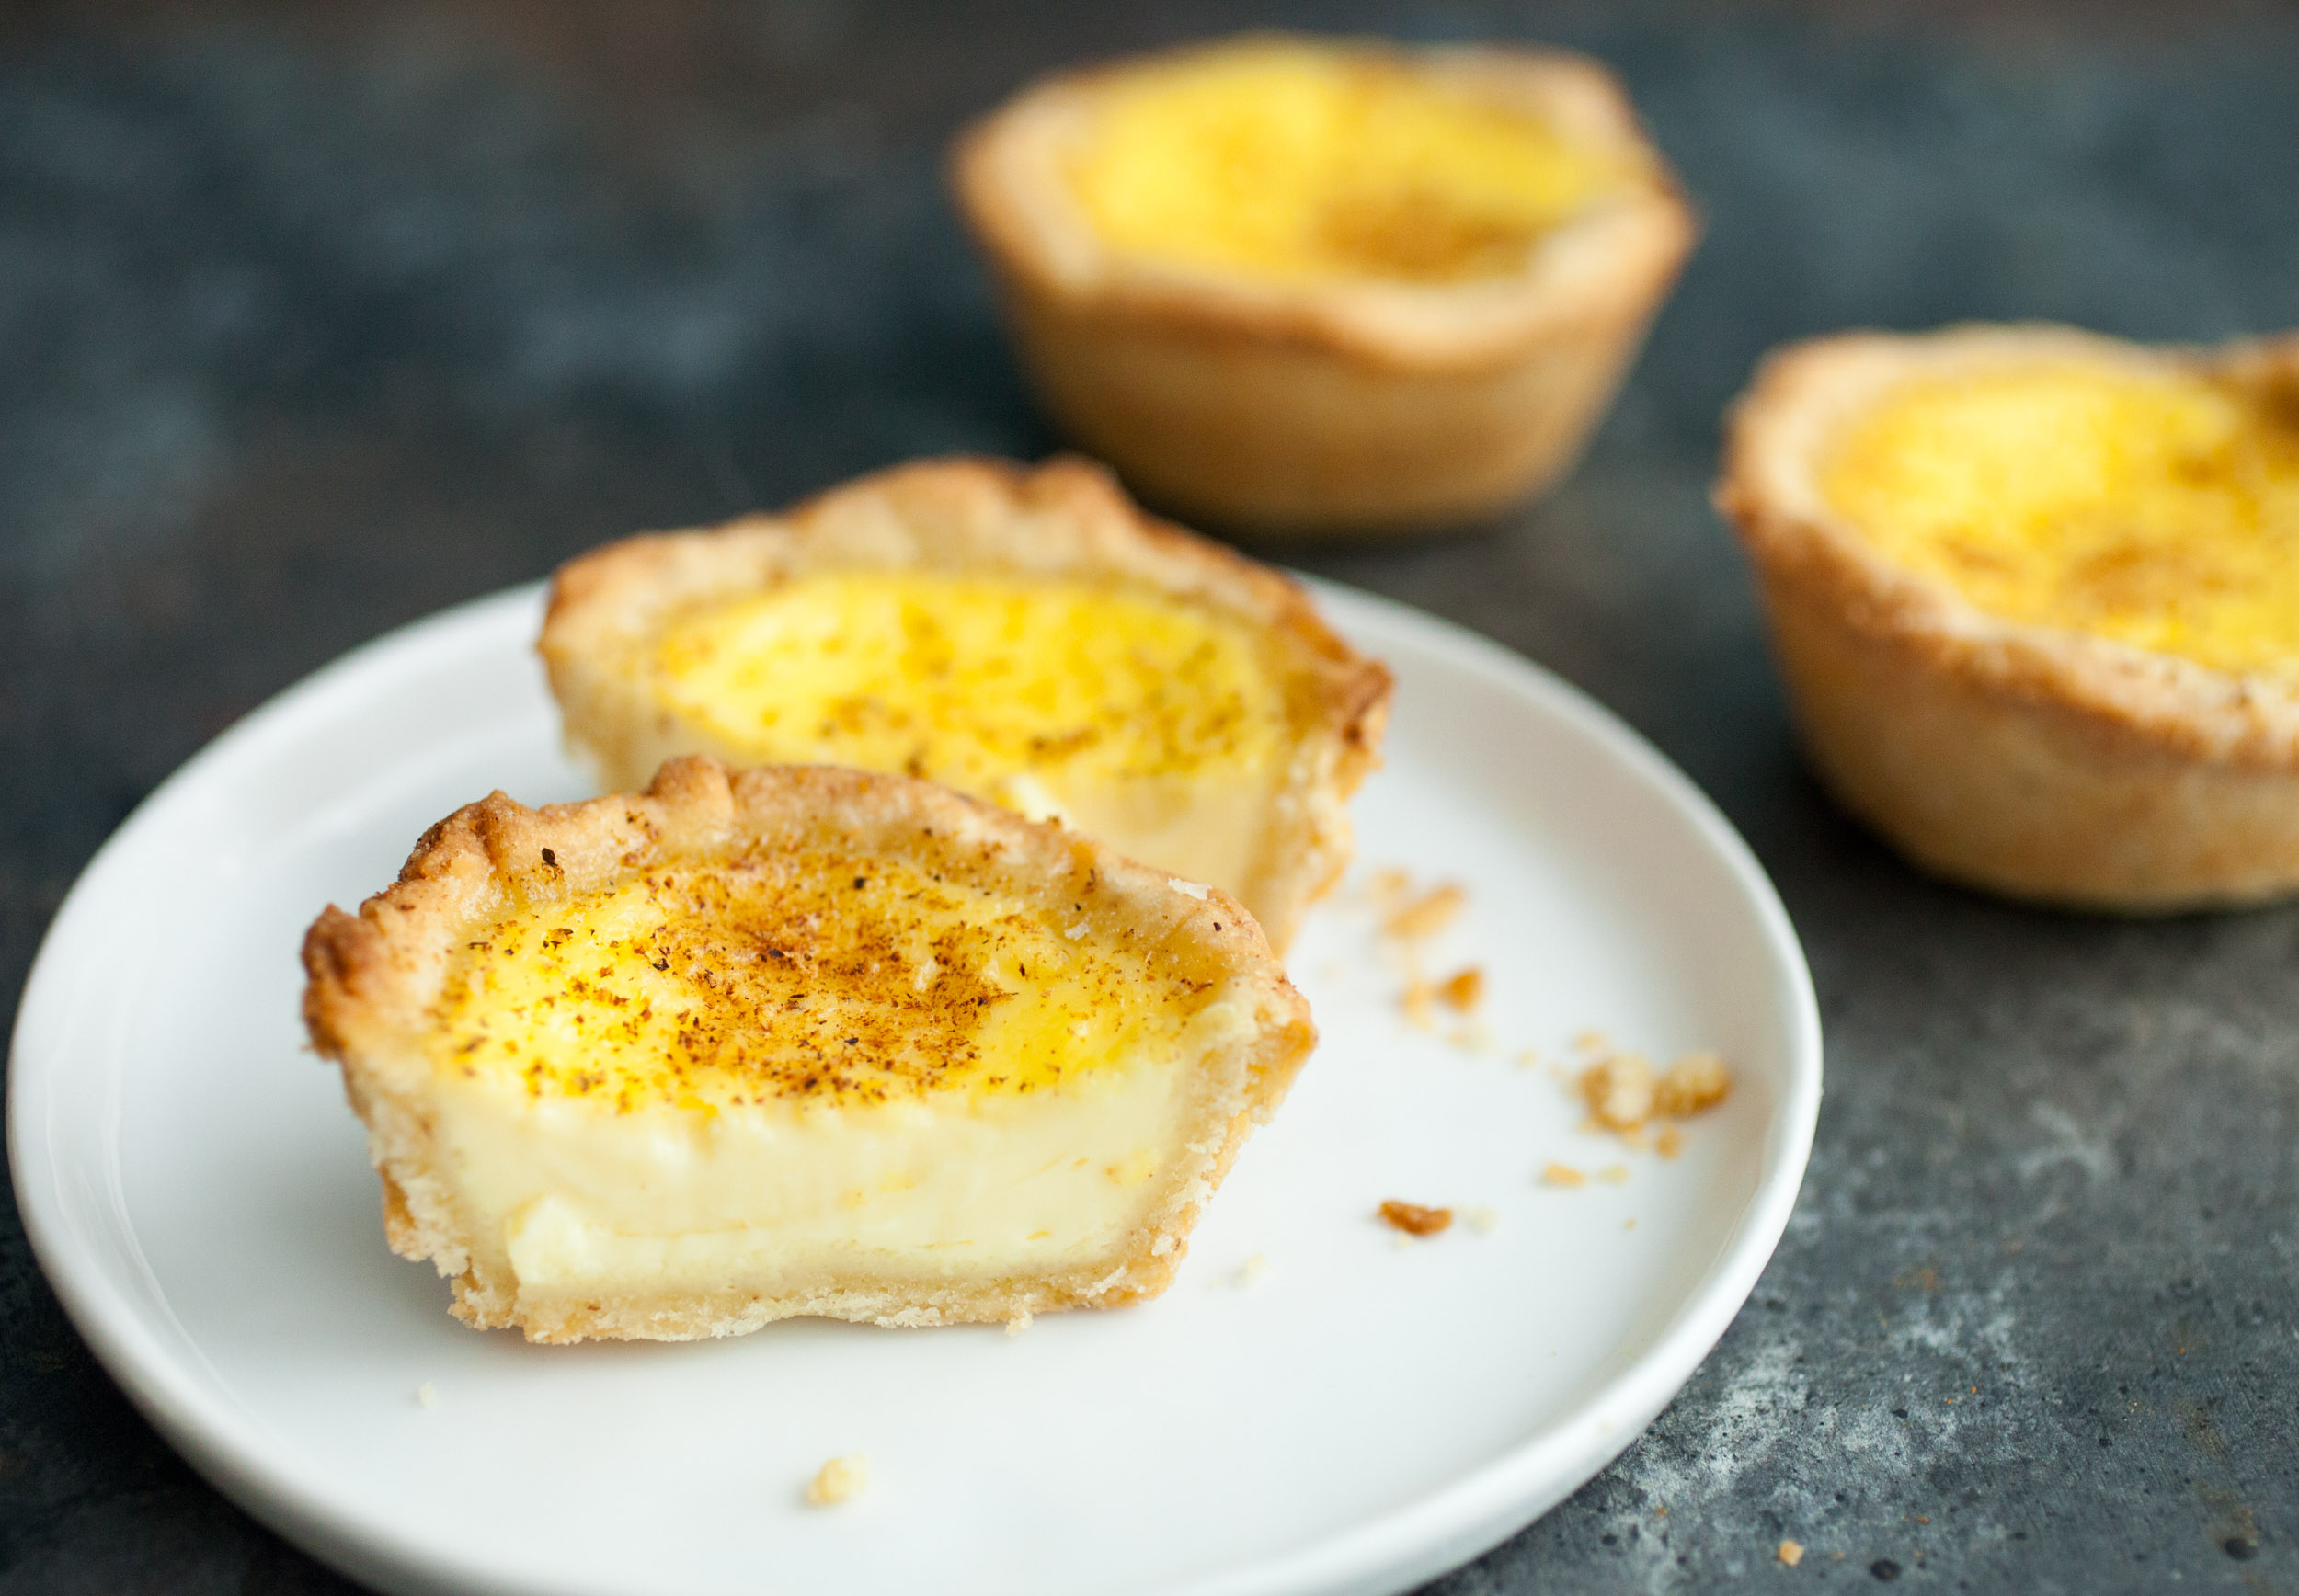
https://youtu.be/pc5W_L50b5Q
EVALUATION.
1. State three methods each you can use in the preparation of the following foods:
(a) Fish (b) Meat (c) Potatoes (d) Wheat flour
2. Outline any 4 guidelines for choosing a cooking method?
OBJECTIVE QUESTIONS.
1. Using a spoon and circular motion to turn food is
(a)mixing ( b) shirring (c) blinding (d) bluing (e) creaming.
2. Cutting food into long, thin piece is
(a)dicing (b) chopping (c) grating (d) shredding (e) mincing.
3. Decorating a finished dish with a small food is
(a)brushes (b) garnishing (c) bestriding (d) darning (e)gracing
4. --------- makes food easier to eat
(a) Garnishing (b) Storing (c) Cooking (d) Washing (e)Dressing.
5. Which of the following is not a method of cooking food?
(a) Boiling (b) wing (c) Steaming (d) Baking (e) Garnishing.
6. The process of cooking food over boiling water is called.
(A) Frying (b) roasting (c) baking (d) grilling (e) boiling.
7. ----------- food is easily digested
(a) Fried (b) Roasted (c) Grilled (d) Steamed (e) Baked.
8.Foods cooked by -------- do not digest easily
(a) Boiling (b) steaming (c) stewing (d) grilling (e) frying.
9. Baking is often done in
(a) refrigerator (b) cooker (c) oven (d) sink (e) stove.
10. Meals for children, invalids and the aged should be cooked by
(a) frying or grilling (b) boiling or steaming (c) boiling or frying (d) roasting or baking (e) steaming or frying
TOPIC: FOOD PREPARATION METHODS.
CONTENTS: (a) Procedures for use of cooking methods.
(b) Preparation of simple dishes.
PROCEDURES FOR USE OF COOKING METHODS.
METHODS OF COOKING FOOD.
1. BOILING: This is the process of cooking food in boiling water, until it is tender. Many foods can be boiled e.g. yam, rice, beans, meat, plantain, etc.
Guidelines for boiling:
1. The water should be made to cover the food being cooked.
2. The lid should fit the pot properly to prevent theloss of steam and heat.
3. Avoid over cooking the food.
4. Stain the water after boiling the food.
Advantages of boiling
i. It is an easy and quick method of cooking.
ii.It makes food soft and easy to digest.
iii. Many food can be cooked by boiling
Disadvantages of boiling.
i. Some food nutrients e.g., water-soluble vitamins can be lost in the boiling water.
2. STEWING:This is the method of cooking food slowly or at a low heat in a small quality of water, in a covered pot for a long time. It is commonly used for making soups.
Advantages of stewing.
i. Food nutrients are conserved or retained in the stewing liquid.
ii. Stewed foods are easily digested.
Iii. Flavours of foods is retained in stewing.
Disadvantages of stewing
i.It is a long and slow method of cooking.
ii. It requires longer time than boiling.
3. STEAMING: This is the method of cooking food in the steam of boiling water. There is no direct contact between the food and the boiling water.
Guidelines for steaming
1. The steamer must fit the pan. The lid must fit tightly to prevent escape of steam.
2.The water in the lower container or round the vessels container or round the vessels containing the food must be boiling all the time.
3.All foods other than vegetables should be protected by wrapping with water proof, so that condensed steam will not make the food sodden.
4. The water must be replenished as it boils away.
5. The time of cooking must be calculated according to the type of food being cooked.
Advantages of steaming.
i. Steamed foods are easily digested. Steaming is therefore suitable for cooking for children, invalids, convalescents, and the aged.
Ii. Nutrients is retained in the food.
Disadvantages of steaming.
i. Steaming takes longer time than boiling. It therefore consumes more fuel.
ii. Steamed tends to lack flavor. They require seasonings.
5. FRYING:This is the method of cooking food in hot oil.
Types of frying.
i. Shallow fat frying: The food is fried in a little oil or fat. A frying pan is used and the oil just covers the bottom of the pan. Foods cooked by this method are meat, fish, pancakes, eggs etc.
ii.Sauteing: This is tossing food lightly in a small amount of fat or oils e.g.some vegetables.
Iii.Deep fat frying: Food is fried in plenty of oil or fat. A deep pan or pot is used. Foods cooked this way are akara balls, chin-chin, yam slices, doughnut, etc.
Iv. Dry frying: This involves frying food in its own oil, e.g. Bacon.
Guidelines for frying
1. Determine the type of frying suitable for the food to be fried.
2. Use good quality oil.
3. Ensure that the oil is hot enough before putting the food.
4. Fry only a small quantity of food at a time.
5. Drain as much water as possible from foods before placing them in hot oil.
6. Do not turn the food frequently while it is frying to prevent breaking.
7. Do not cover fried food when it is still hot, otherwise, steam will accumulate and make the food soggy or wet.
8. Fried foods should be served hot in order to enjoy its full flavor.
Advantages of frying.
i. It is a quick method of cooking.
ii. Fried foods are very tasty and flavored
Disadvantages of frying.
1. Frying requires careful and constant attention.
2. Fried foods are less easily digested. Frying is therefore not suitable for cooking for invalids and convalescents or the aged.
6. ROASTING: This is a method of cooking food in a dry heat by any of the following:
i. By an open fire or over heated charcoal, e.g. roasted maize, plantain, etc.
ii. In heated sand or ash e.g. roasted yams, potatoes, cocoyam etc.
iii. In an oven or enclosed space with hot fat or oil poured over the food, e.g. roast chicken or large piece of meat.
Advantages of roasting
i. Roasting develops good flavor in food.
ii. Roasting in open fire is an easy and fast method of cooking.
Disadvantages of roasting.
i. Foods tend to shrink during roasting.
ii. It requires constant attention.
7. BAKING: This is a method of cooking food with dry heat in an enclosed space. The air within the enclosed space is heated up to the required temperature. The heated air cooks the food. Baking is done in ovens.
Guidelines for baking
1. The oven must be cleaned and heated to correct temperature before putting the food.
2. Baking sheets and pans must be clean and greased properly.
3. Pans must be properly and evenly distributed in the oven for even circulation or air.
4. Avoid frequent opening of the oven. This causes cold air to rush in and lower the oven temperature.
5. Time your baking and monitor it properly.
Disadvantages of baking.
i. It requires attention.
ii. It requires careful temperature control.
8. GRILLING: This is the method of cooking food over, under or in front of a smokeless fire. Grilling can also be done beneath the glowing reflector of a gas or electric grill.
Advantages of grilling.
i. It is a quick method of cooking.
ii. Grilled foods can digest easily.
Disadvantages of grilling.
i. Grilling requires careful and constant attention.
EVALUATION.
1. Which of the following is not a method of cooking food?
(a) Boiling (b) wing (c) Steaming (d) Baking (e) Garnishing.
2. The process of cooking food over boiling water is called.
(a) Frying (b) roasting (c) baking (d) grilling (e) boiling.
3. ----------- foods are easily digested
(a) Fried( b) Roasted (c) Grilled (d) Steamed (e) Baked.
4. Foods cooked by -------- do not digest easily
(a) Boiling (b) steaming (c) stewing (d) grilling (e) frying.
5. Baking is often done in
(a) Refrigerator (b) cooker (c) oven (d) sink (e) stove.
6. Meals for children, invalids and the aged should be cooked by
(a) frying or grilling (b) boiling or steaming (c) boiling or frying (d) roasting or baking (e) steaming or frying
LESSON 16
PREPARATION OF SIMPLE DISHES.
PANCAKE (FRYING).
¼ litre of milk
100 flour
1 egg
A pinch of salt.
½ cup of vegetable oil
Method.
1. Place the flour into a mixing bowl.
2. Mix the egg and milk in a bowl.
3. Gradually, add the egg, milk into the flour and mix/whisk.
4. Continue whisking until there are no lumps.
5. Add salt and whisk again.
6. Leave the batter to stand for about 10 minutes.
7. Put about 1 tablespoonful of vegetable oil in dry frying pan. Heat gently.
8. Pour in about 2 tablespoonful of batter into the frying pan. Tip the pan so that the batter spreads all over it.
9. Cook the pancakes slowly until it has set.
10. Turn the pancake with a turner.
11. Cook the other side for about two minutes sprinkles with sugar and roll of fold.
12. Serve the pancake on a flat plate.
13. Cook the remaining mixture in the same way and serve hot.
https://youtu.be/LWuuCndtJr0
CAKE MAKING. ( BAKING)
Creaming method.
Basic Recipe.
200 g flour 125 g fat
125 g sugar 75 ml milk to mix
2 eggs 1 teaspoon baking powder
Method.
1. Cream sugar and fat together until soft, white and creamy. Use a wooden spoon and work lightly, with a circular motion.
2. Add the beaten eggs by degrees, continuing the creaming between each addition. If mixture begins to curdle add a little flour to make it smooth again.
3. Using a metal spoon, fold in one third of the flour adding a little milk if necessary. Repeat with the second one-third of the flour, add a little milk.
4. Add any fruit listed in the recipe and final third of the flour to which the baking powder has been added. Add more milk if necessary to keep mixture to a soft dropping consistency, i.e it should be soft enough to drop from the spoon. Add the essence.
5. Bake in little a moderate oven-small cake for 20 minutes and a little longer for larger cakes.
https://youtu.be/NkV3xKUUd1s
EGG CUSTARD (STEAMED OR BAKED)
Recipe
¼ liter of milk A pinch of salt
½ cup of vegetable oil
100 g flour
1 egg
Method
1. Put the sugar into mixing bowl.
2. Break the egg into the bowl.
3. Add milk and vanilla essence slowly, and whisk.
4. Pour into a greased Pyrex dish or any other container suitable for steaming.
5. Place in a steamer.
6. Steam for about 30 minutes or until the custard is set.
7. Serve hot.
https://youtu.be/pc5W_L50b5Q
EVALUATION.
1. State three methods each you can use in the preparation of the following foods:
(a) Fish (b) Meat (c) Potatoes (d) Wheat flour
2. Outline any 4 guidelines for choosing a cooking method?
OBJECTIVE QUESTIONS.
1. Using a spoon and circular motion to turn food is
(a)mixing ( b) shirring (c) blinding (d) bluing (e) creaming.
2. Cutting food into long, thin piece is
(a)dicing (b) chopping (c) grating (d) shredding (e) mincing.
3. Decorating a finished dish with a small food is
(a)brushes (b) garnishing (c) bestriding (d) darning (e)gracing
4. --------- makes food easier to eat
(a) Garnishing (b) Storing (c) Cooking (d) Washing (e)Dressing.
5. Which of the following is not a method of cooking food?
(a) Boiling (b) wing (c) Steaming (d) Baking (e) Garnishing.
6. The process of cooking food over boiling water is called.
(A) Frying (b) roasting (c) baking (d) grilling (e) boiling.
7. ----------- food is easily digested
(a) Fried (b) Roasted (c) Grilled (d) Steamed (e) Baked.
8.Foods cooked by -------- do not digest easily
(a) Boiling (b) steaming (c) stewing (d) grilling (e) frying.
9. Baking is often done in
(a) refrigerator (b) cooker (c) oven (d) sink (e) stove.
10. Meals for children, invalids and the aged should be cooked by
(a) frying or grilling (b) boiling or steaming (c) boiling or frying (d) roasting or baking (e) steaming or frying